> ## Documentation Index
> Fetch the complete documentation index at: https://linkrunner-01ef8e08-darshil-docs-signup-webhook-network-name.mintlify.site/llms.txt
> Use this file to discover all available pages before exploring further.
# Audience from Customer List
Upload a list of customers directly to the ad platform to create a custom audience for remarketing.
## Google
### 1. Prepare Your Data
* Create a segment in Linkrunner from Audience Cohort and download the CSV
### 2. Upload to Google Ads
#### Navigate to Audience Manager
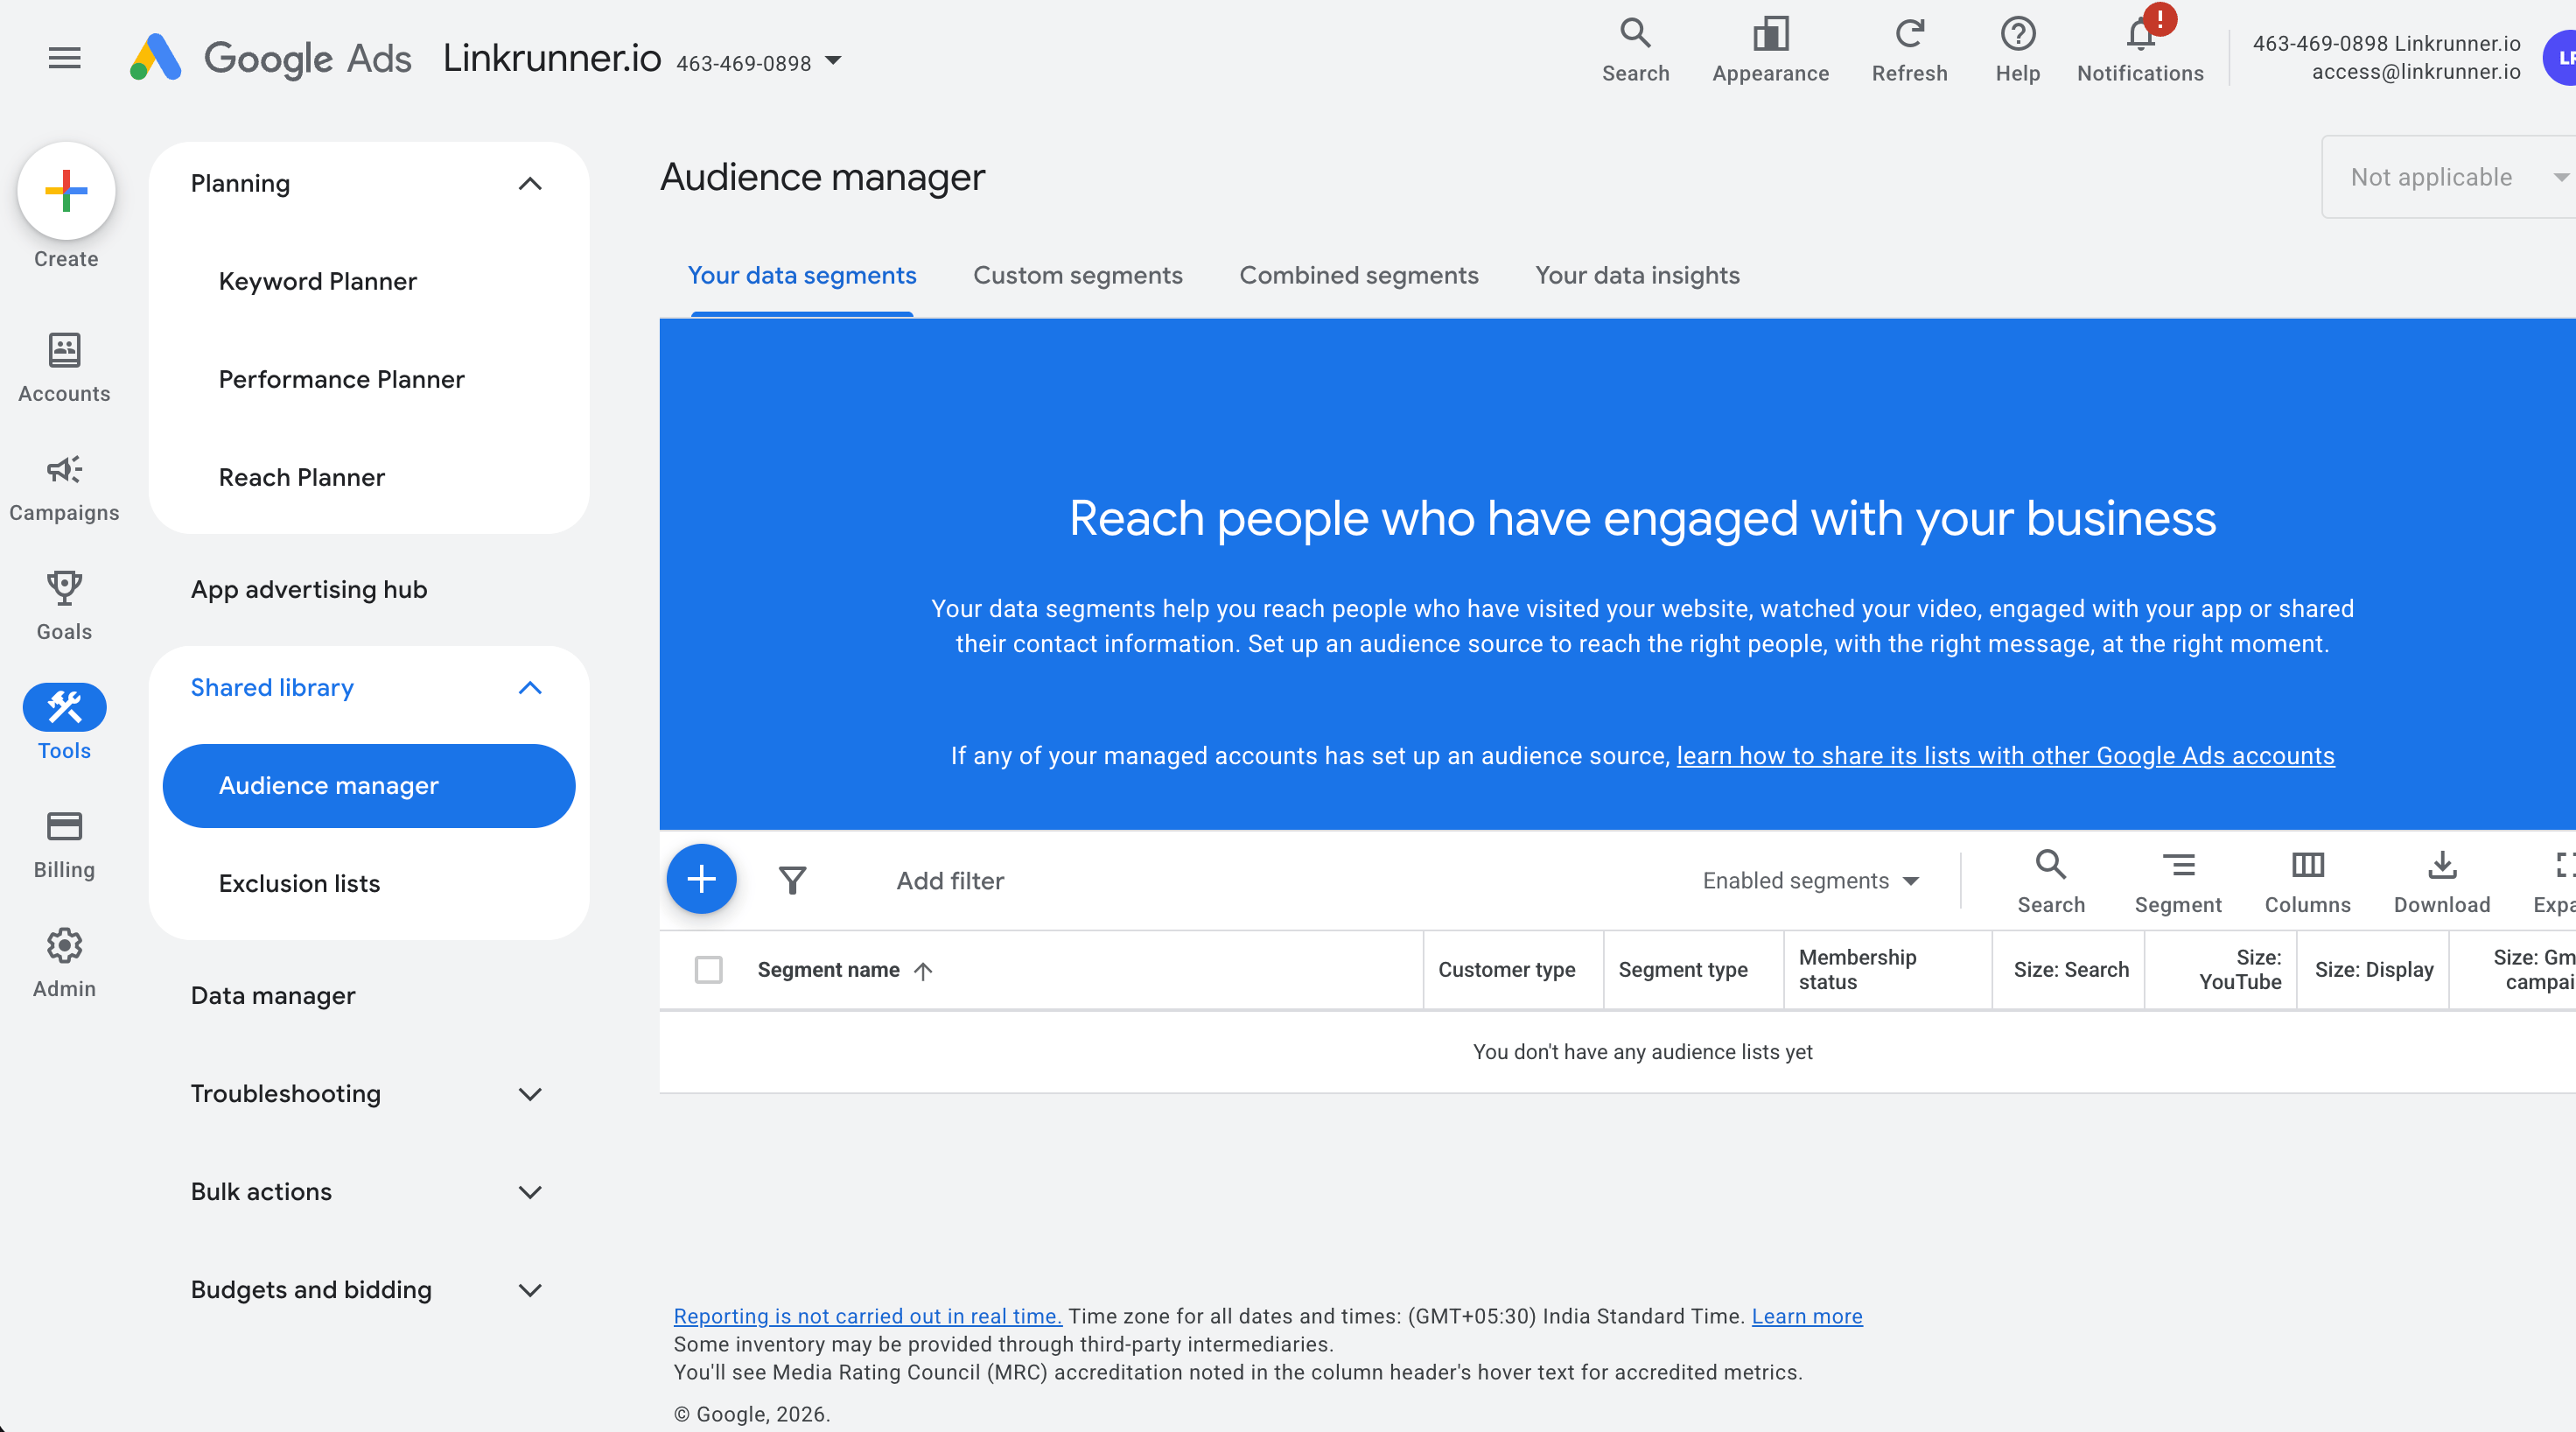
1. In your Google Ads account, click the **Tools** icon (the wrench) in the left menu
2. Under the "Shared library" section, click **Audience manager**
 #### Create a New Customer List
1. Click the blue **+** button
#### Create a New Customer List
1. Click the blue **+** button
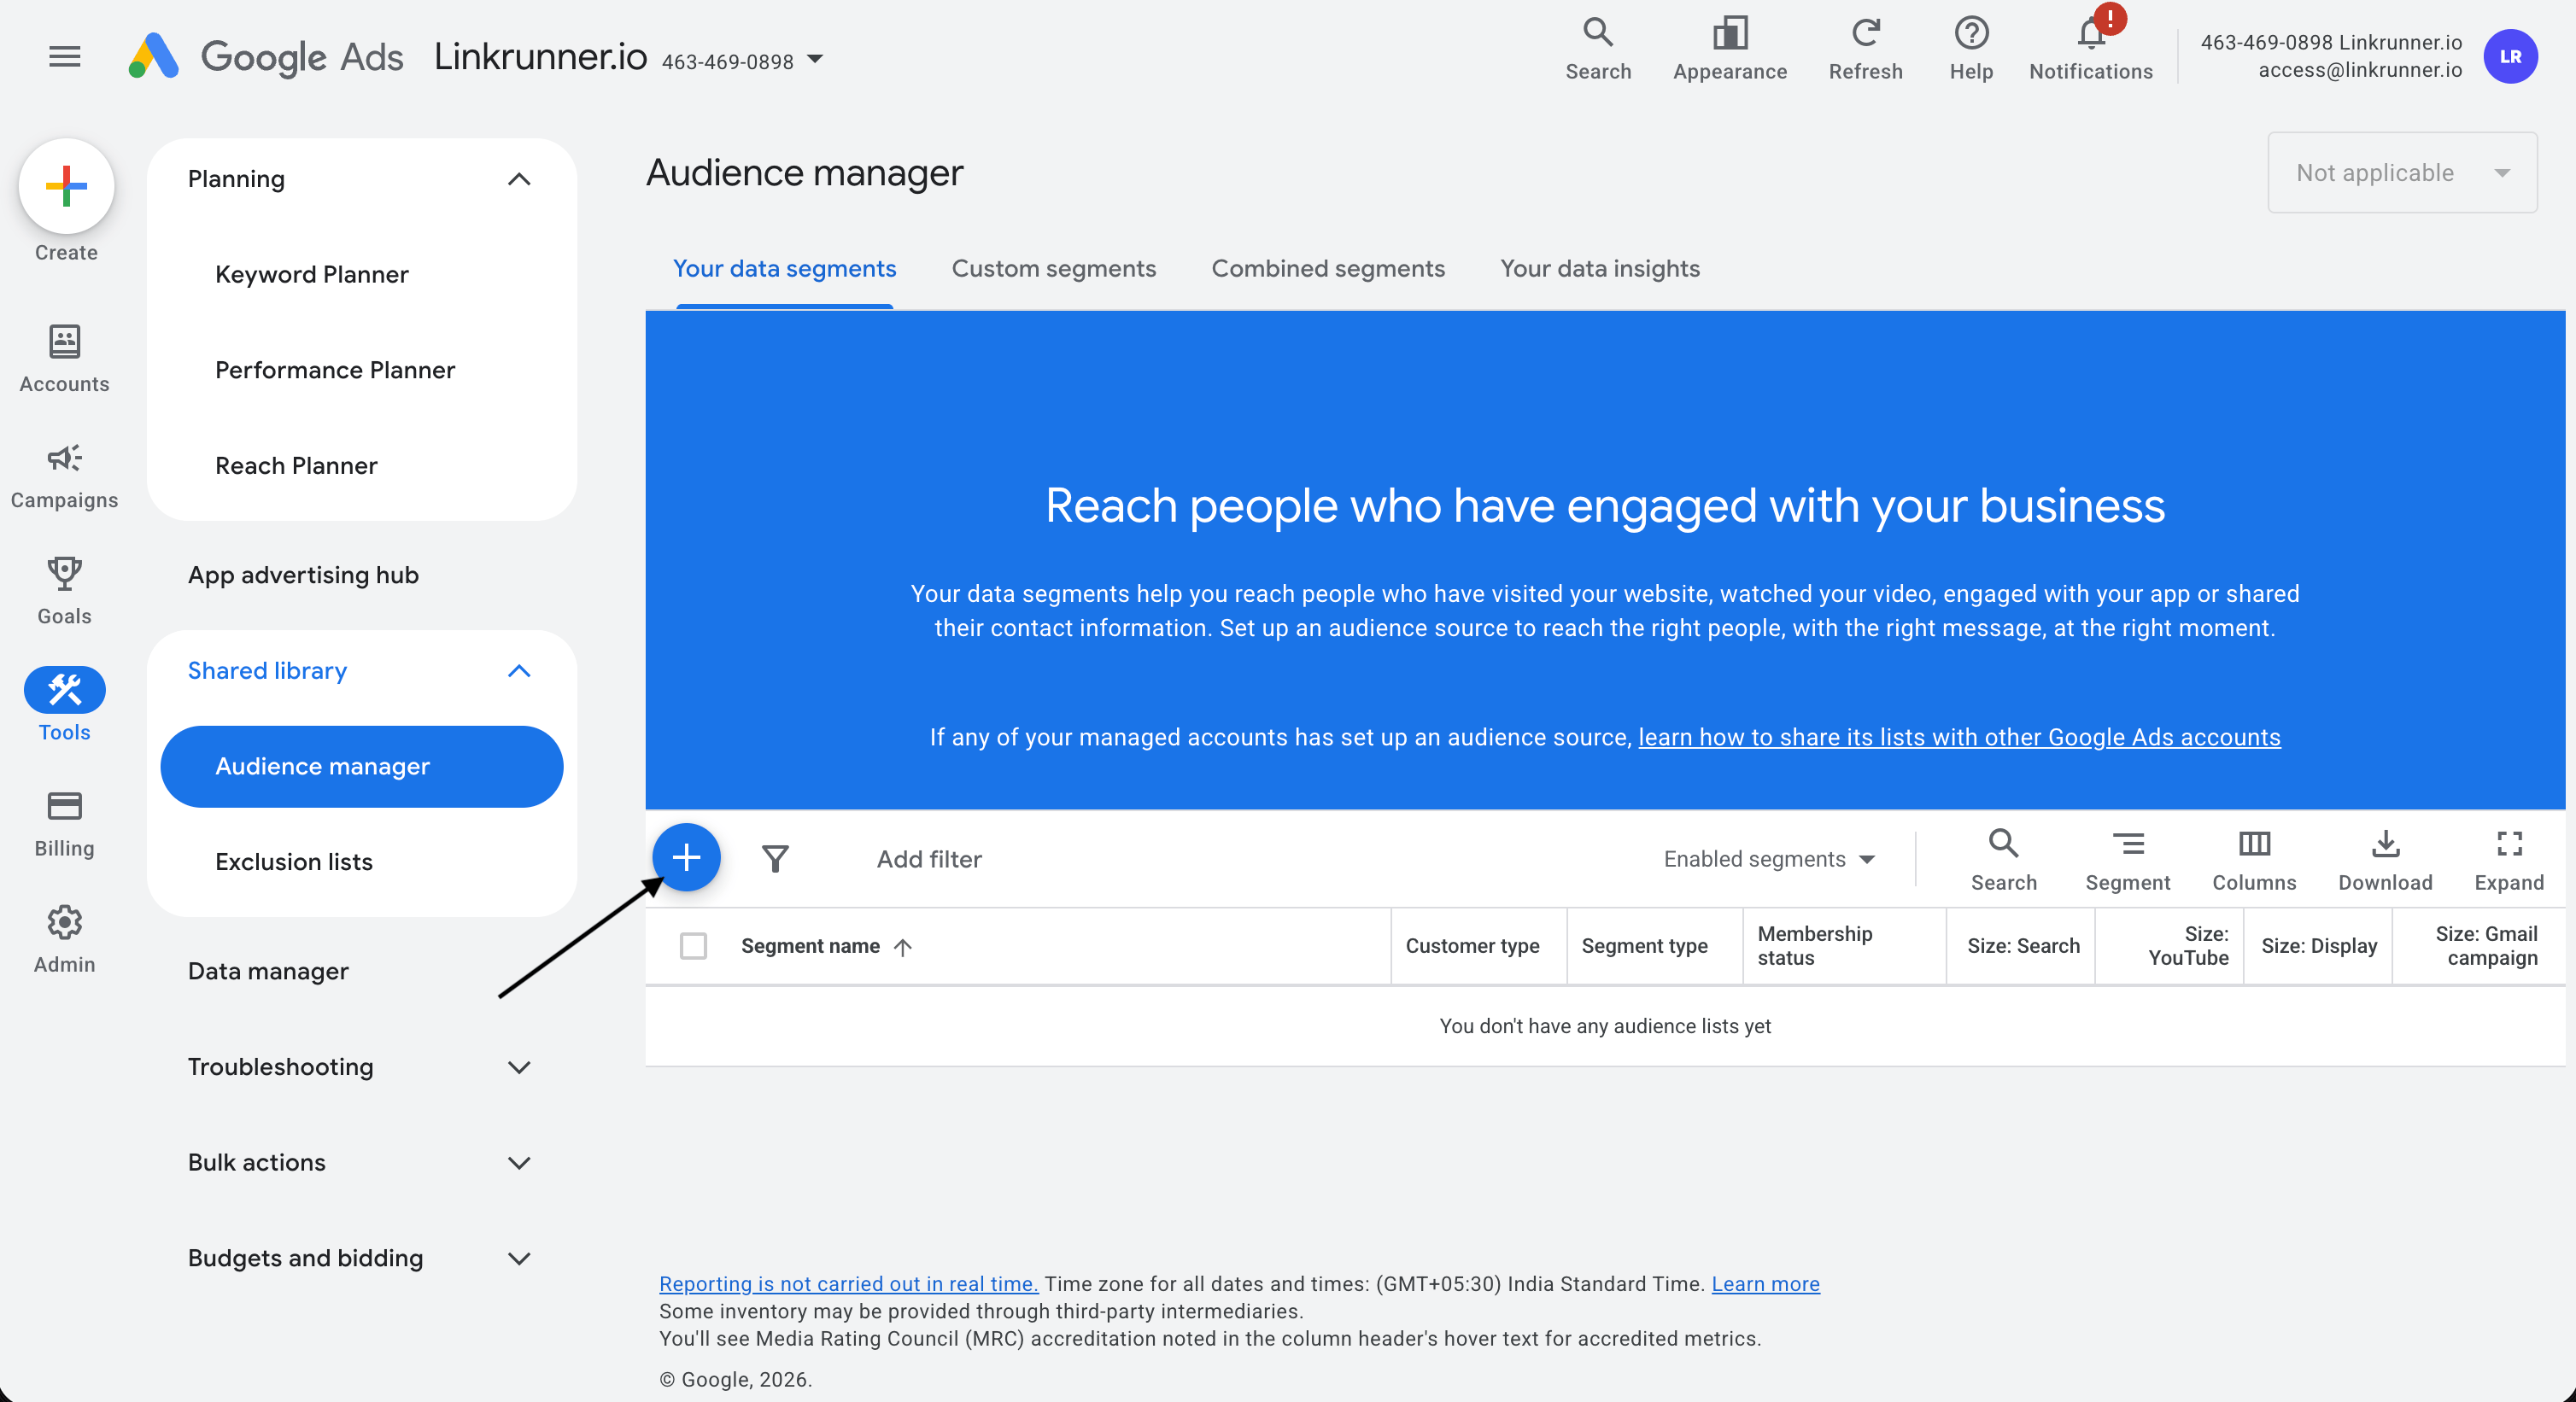 2. Select **Customer list** from the drop-down menu
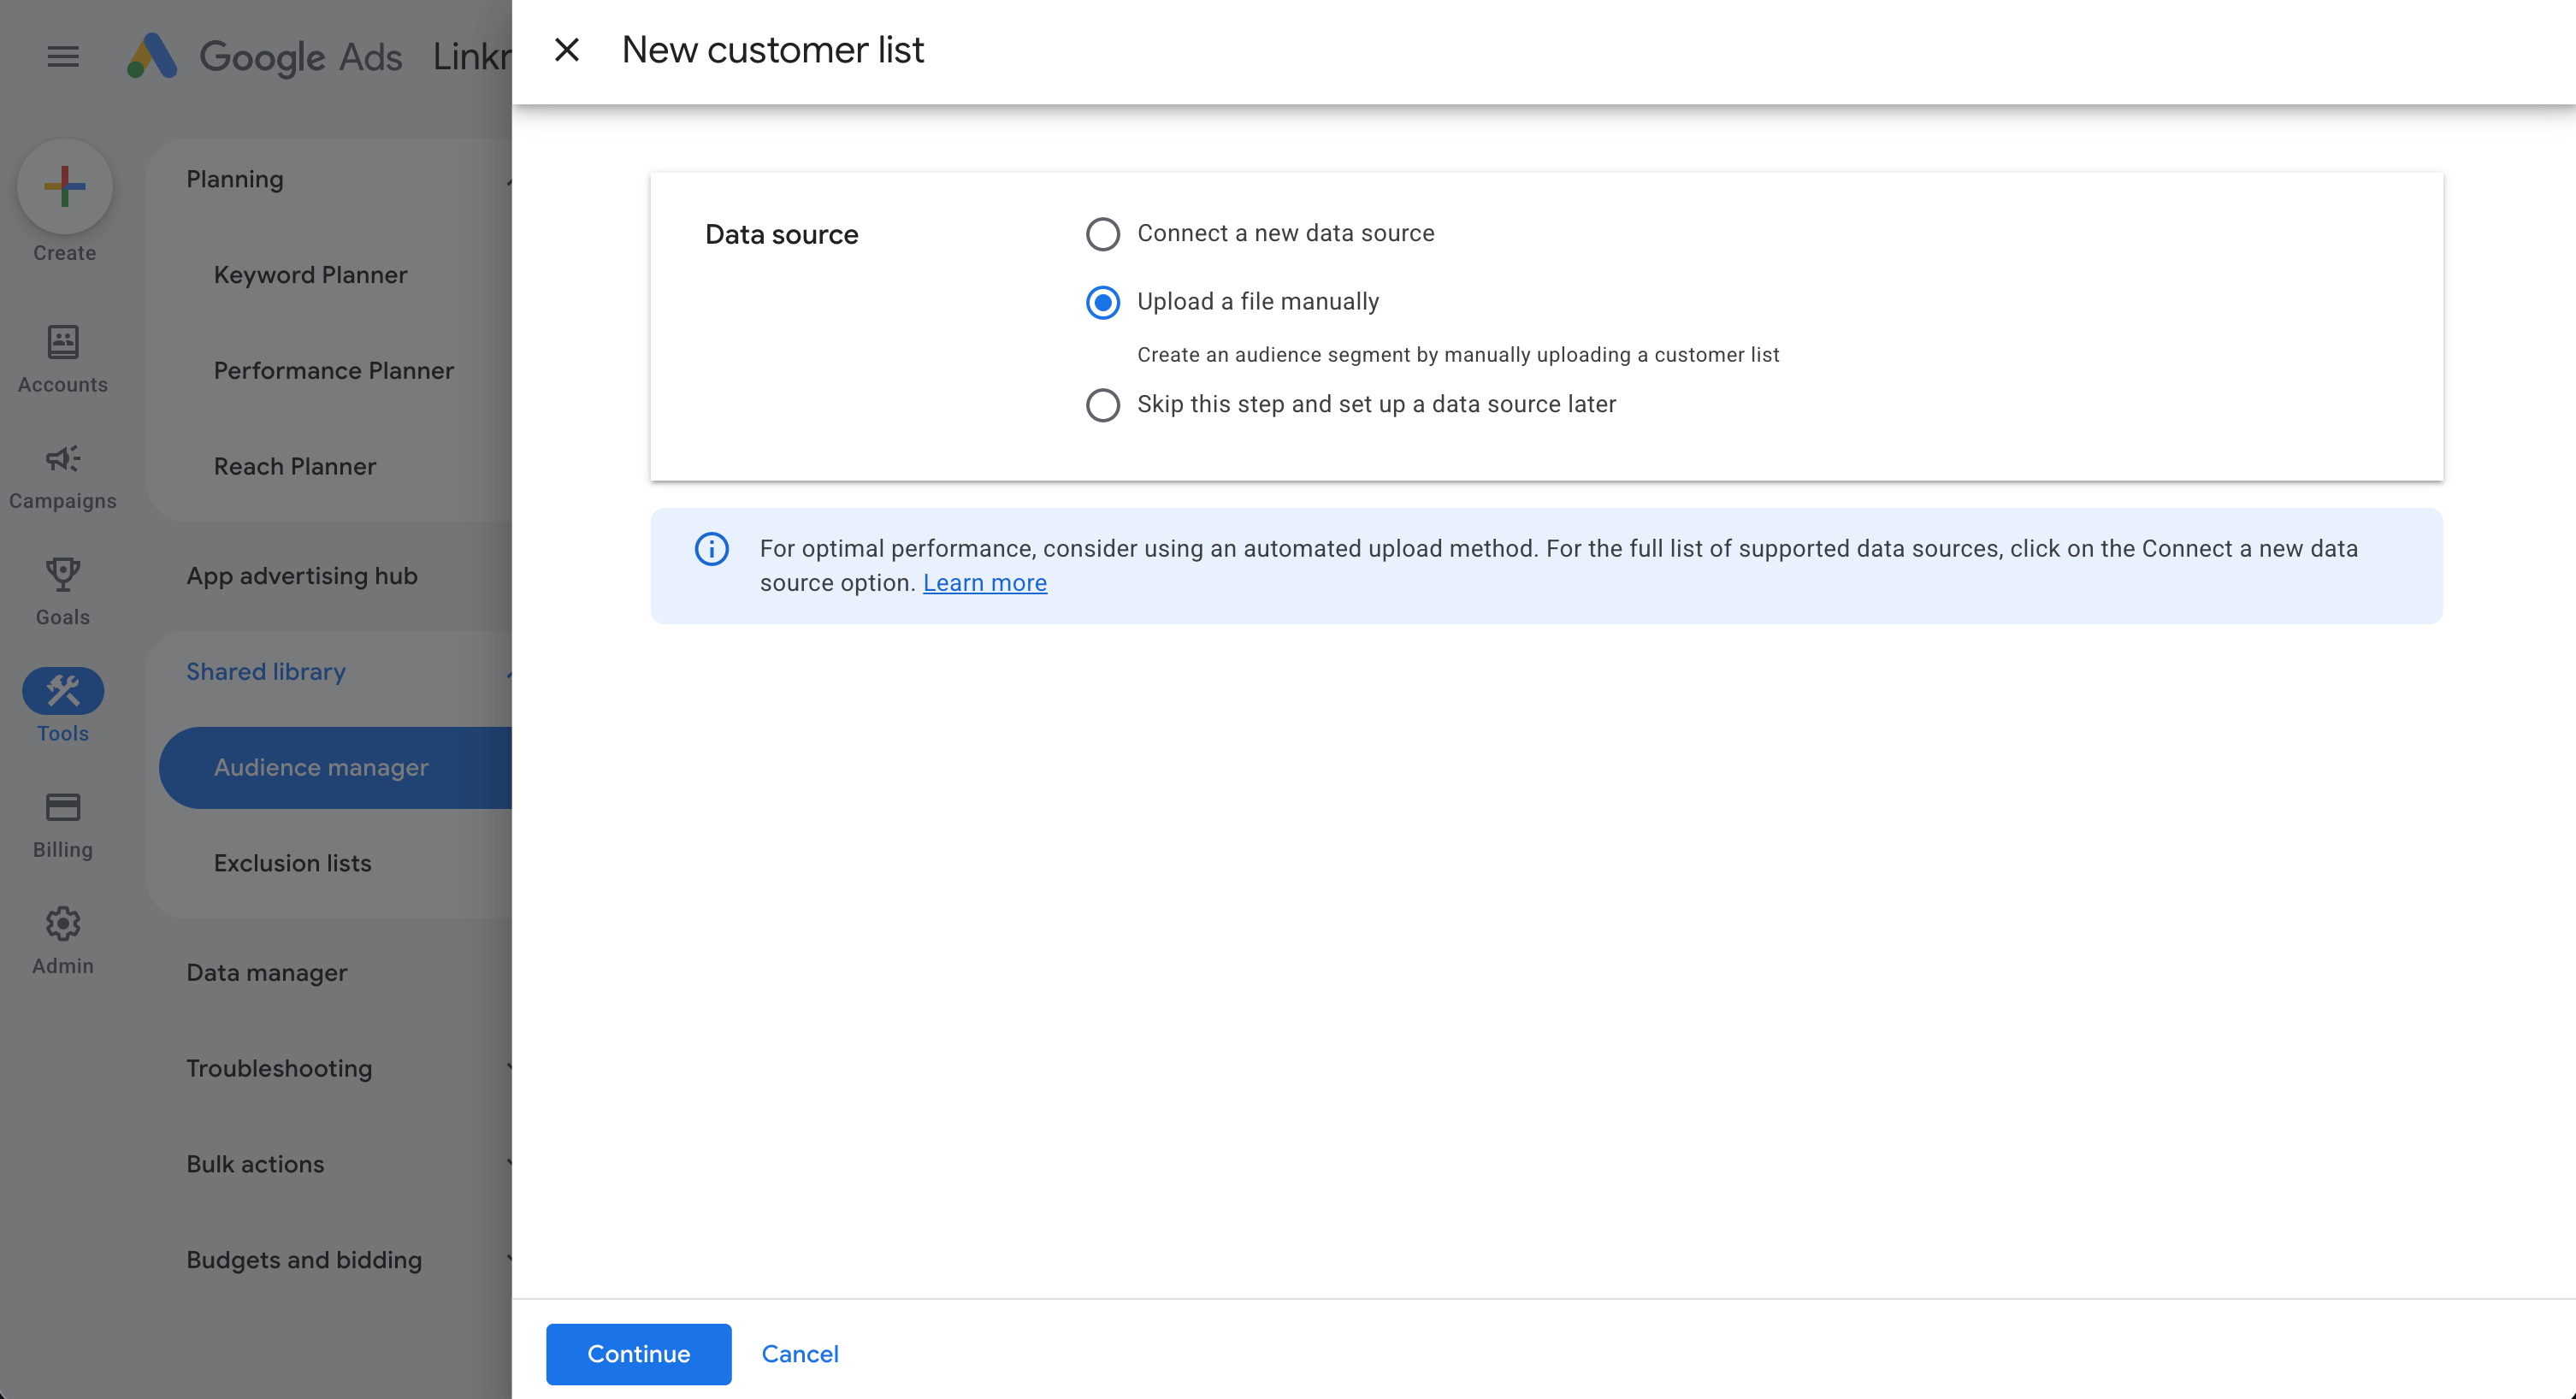
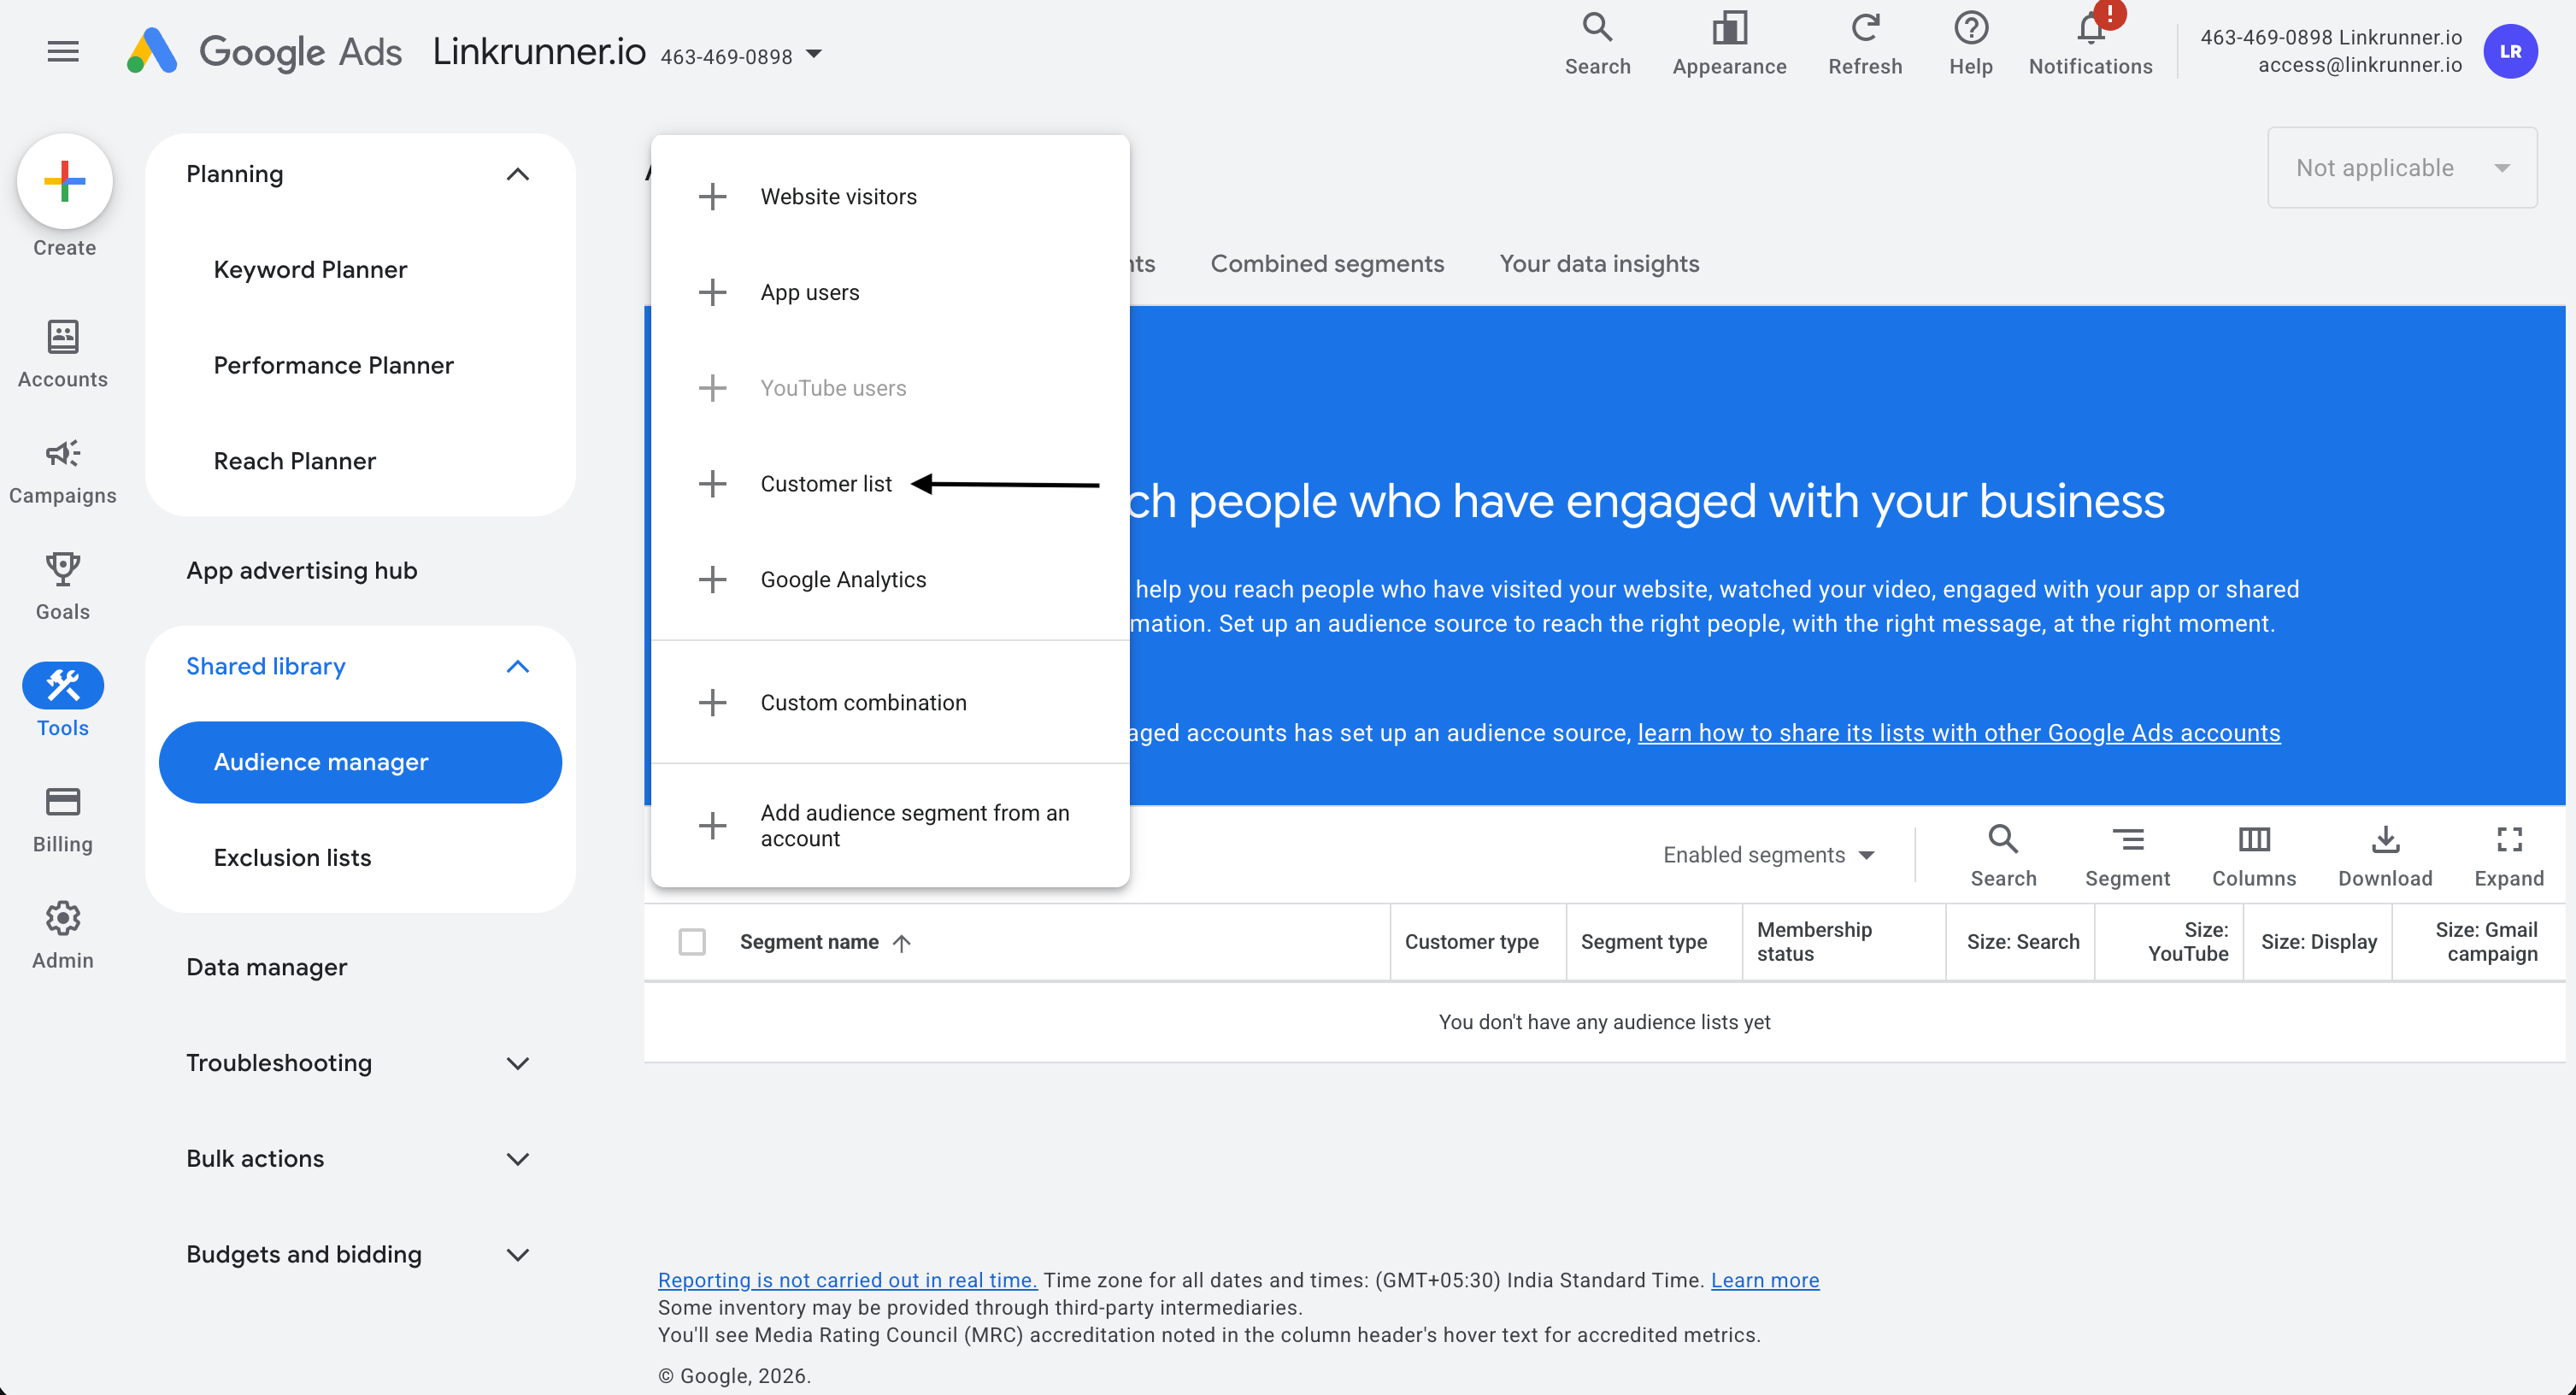 3. Select "Upload a file manually" and click **Continue**
 #### Configure the List
* **Segment Name**: Give your audience a clear, recognizable name (e.g., "Newsletter Subscribers Q1")
* **Data Type**: Choose "Upload emails, phones, and/or mailing addresses"
* **Data to upload**: Attach your prepared CSV file
* **Membership Duration**: Choose how long you want a user to stay on this list. You can set a specific number of days or choose "No expiration" (the maximum is 540 days)
#### Configure the List
* **Segment Name**: Give your audience a clear, recognizable name (e.g., "Newsletter Subscribers Q1")
* **Data Type**: Choose "Upload emails, phones, and/or mailing addresses"
* **Data to upload**: Attach your prepared CSV file
* **Membership Duration**: Choose how long you want a user to stay on this list. You can set a specific number of days or choose "No expiration" (the maximum is 540 days)
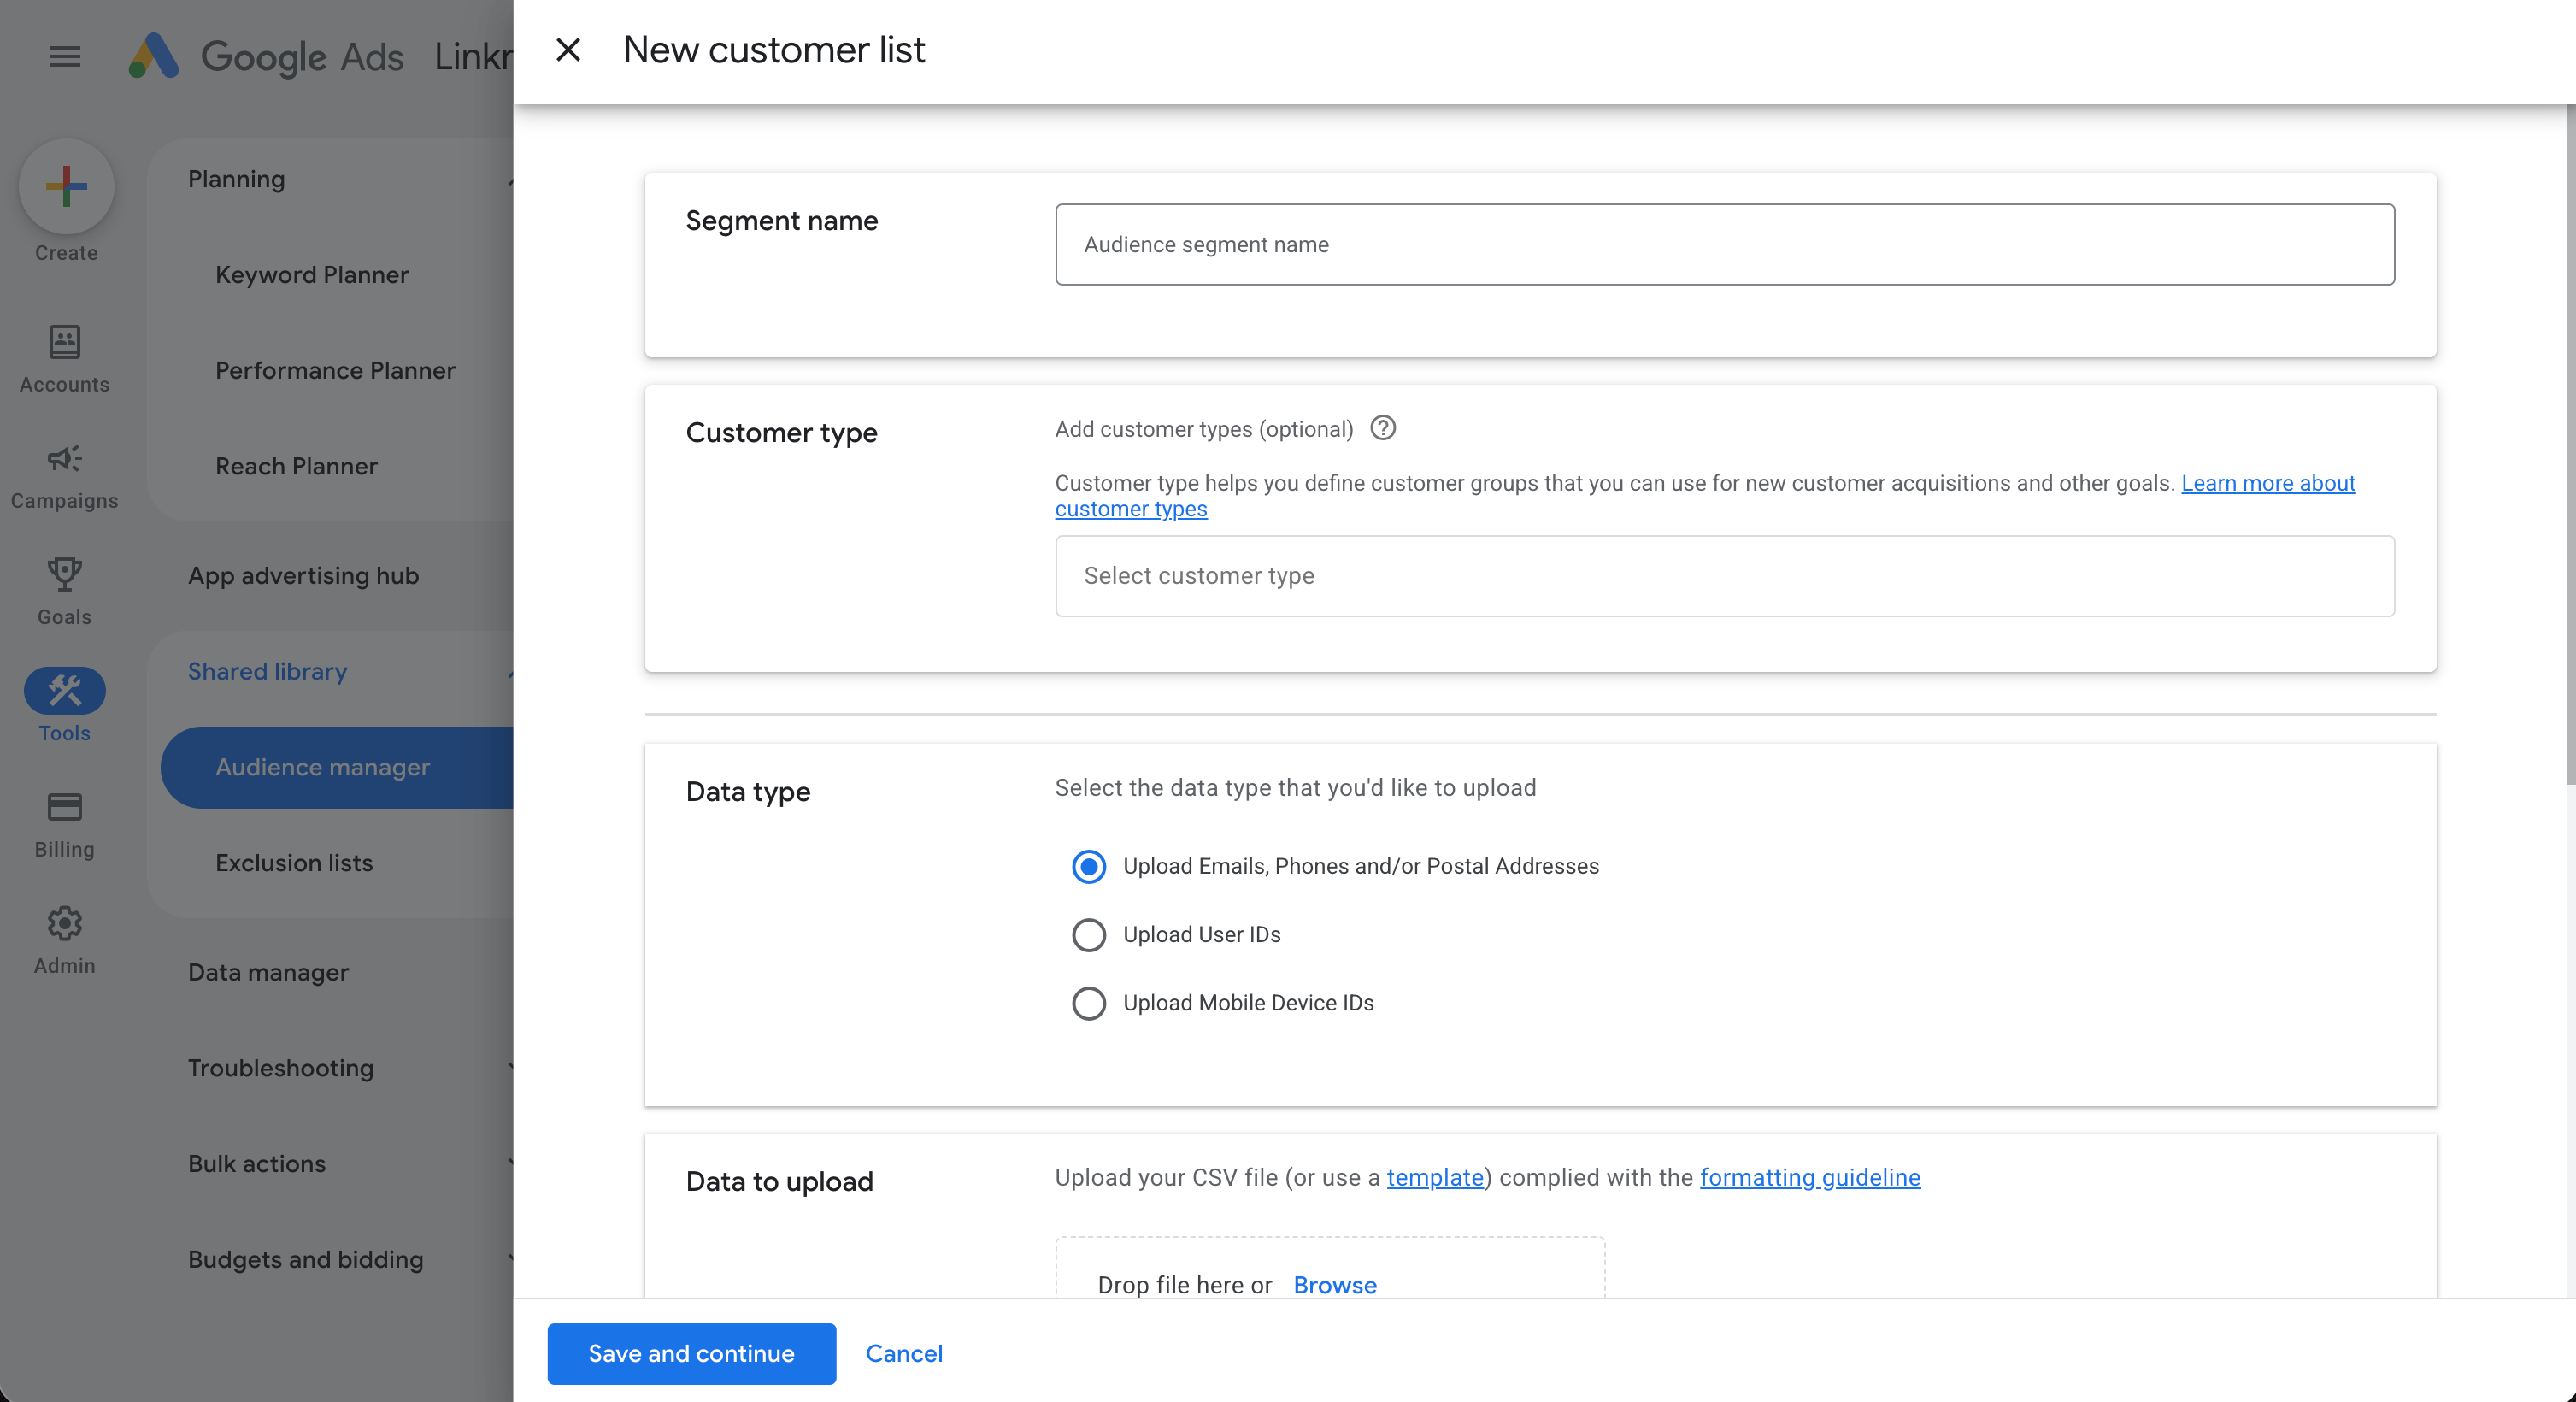 Click on **"Save and continue"** to create the customer list.
## Meta
### 1. Prepare Your Data
* Create a segment in Linkrunner from Audience Cohort and download the CSV
### 2. Upload to Meta Ads
#### Navigate to the Audiences Dashboard
1. Open Meta Ads Manager
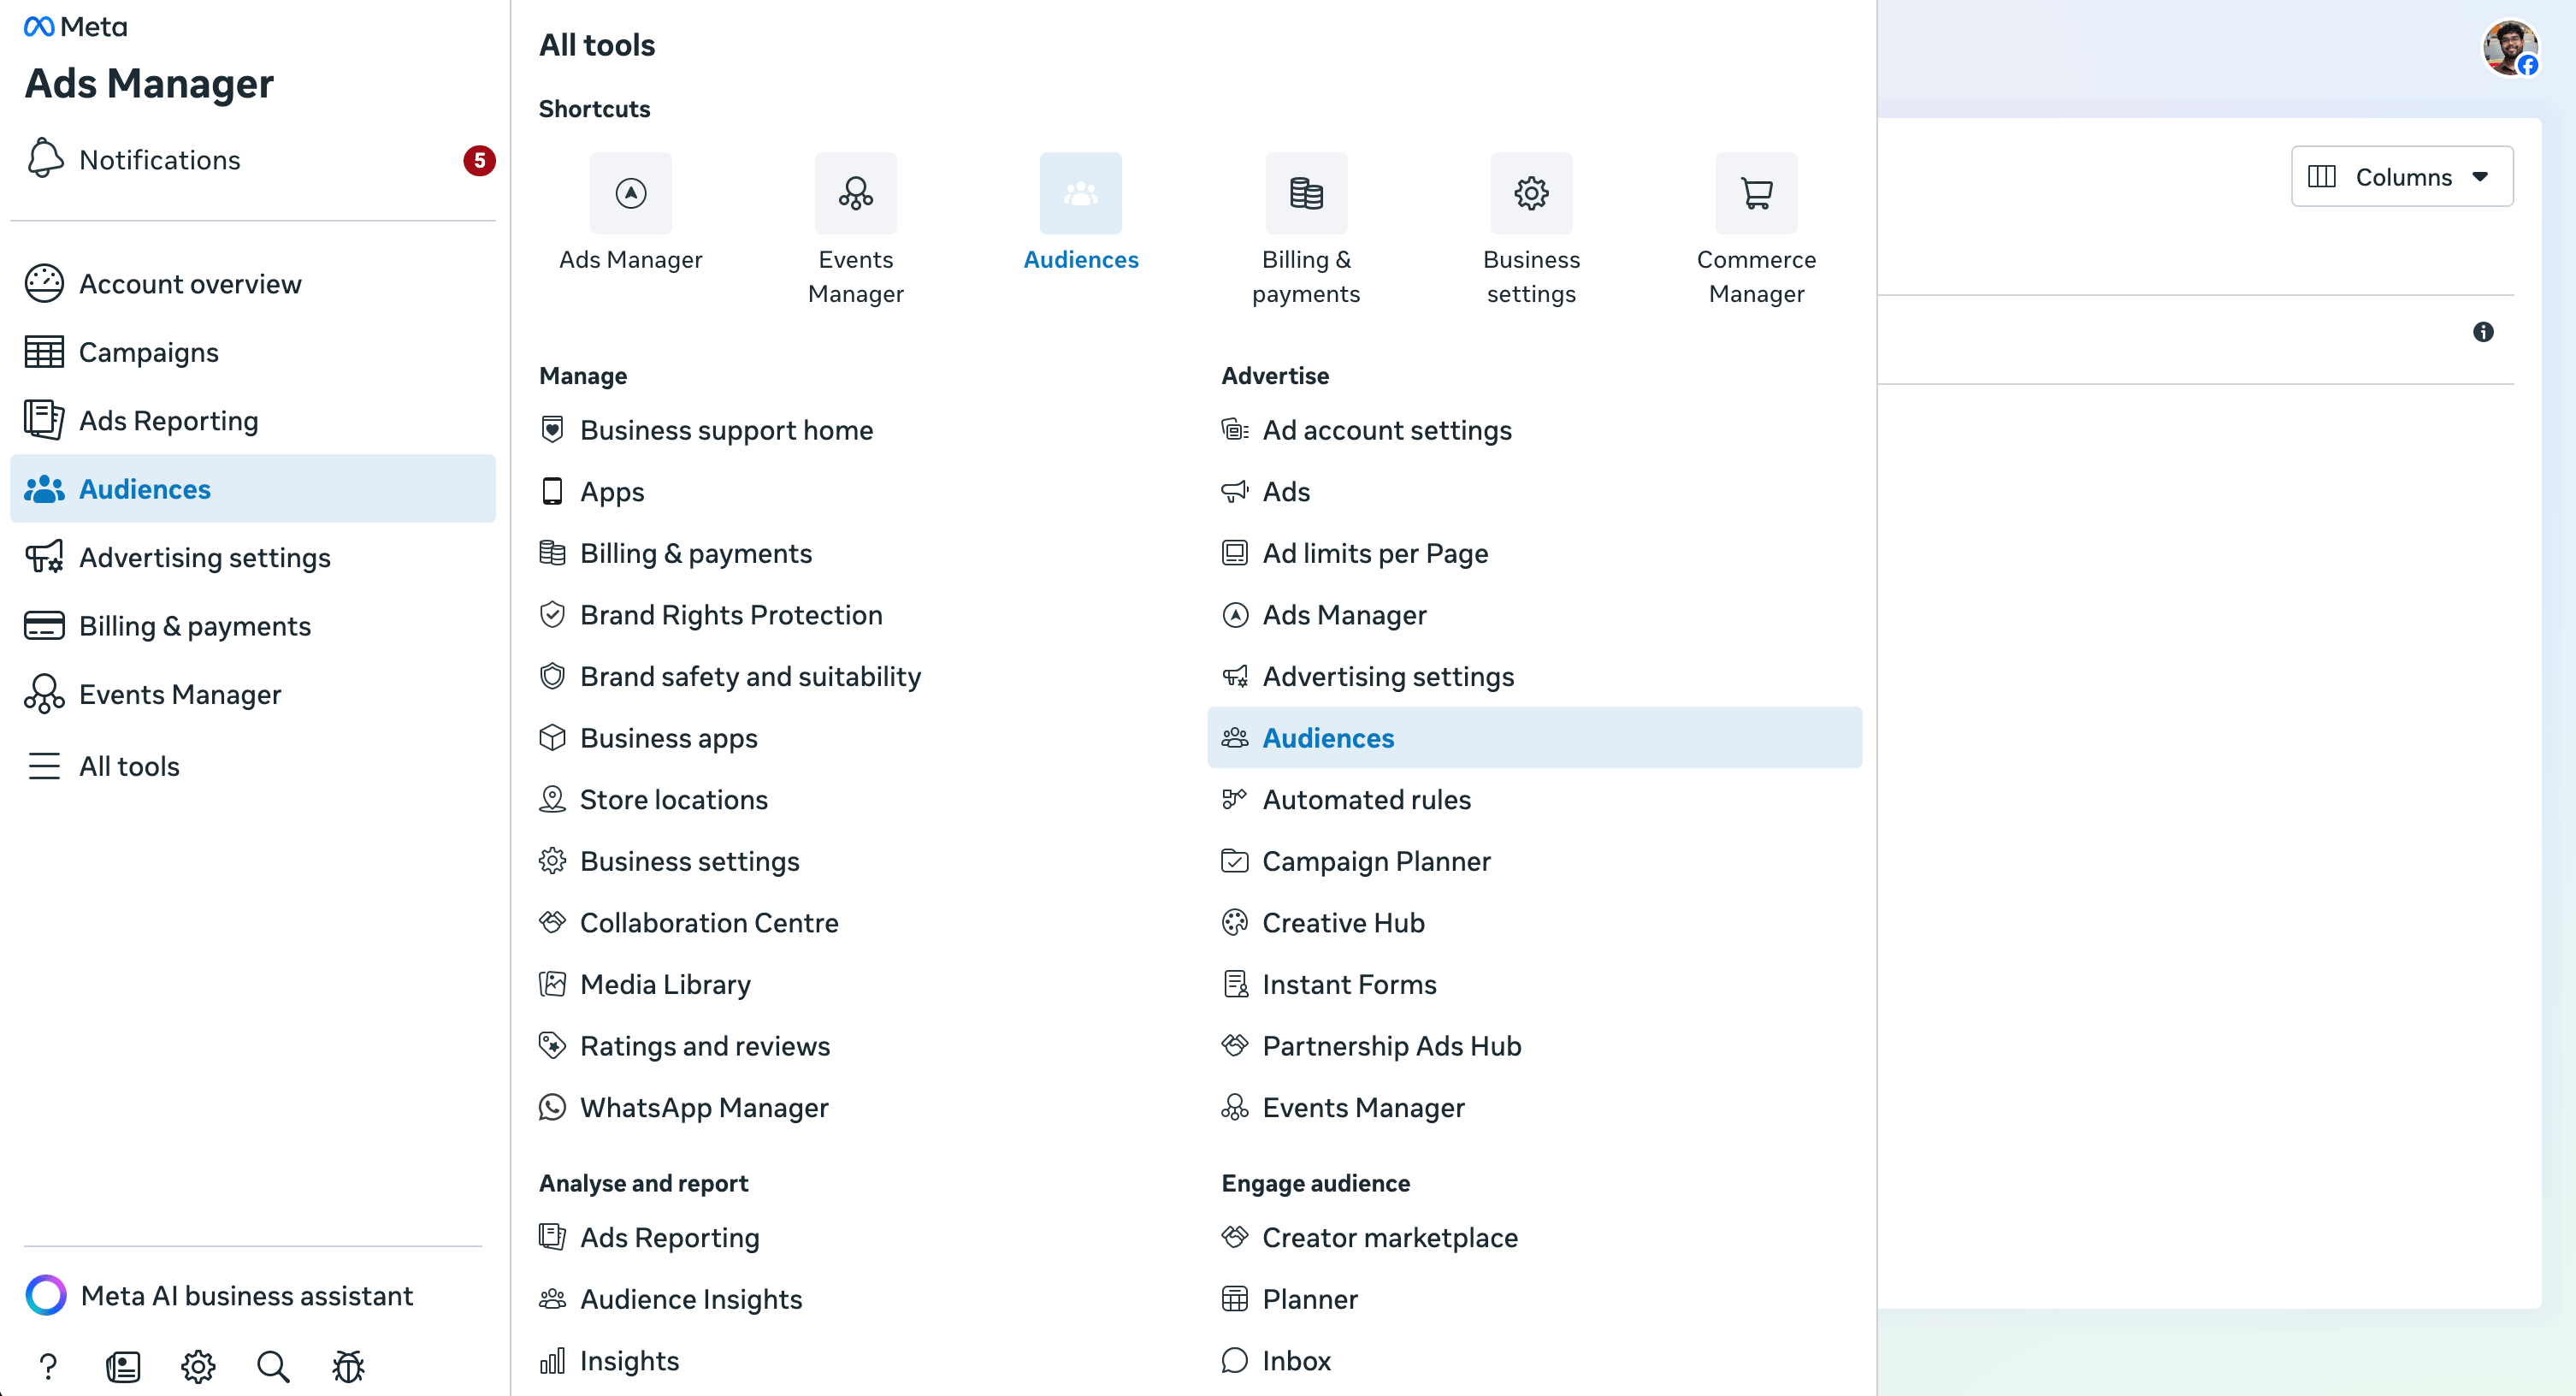
2. Click the **All Tools** menu (the three horizontal lines or "hamburger" icon) on the left sidebar
3. Select **Audiences**
Click on **"Save and continue"** to create the customer list.
## Meta
### 1. Prepare Your Data
* Create a segment in Linkrunner from Audience Cohort and download the CSV
### 2. Upload to Meta Ads
#### Navigate to the Audiences Dashboard
1. Open Meta Ads Manager
2. Click the **All Tools** menu (the three horizontal lines or "hamburger" icon) on the left sidebar
3. Select **Audiences**
 #### Create a Custom Audience
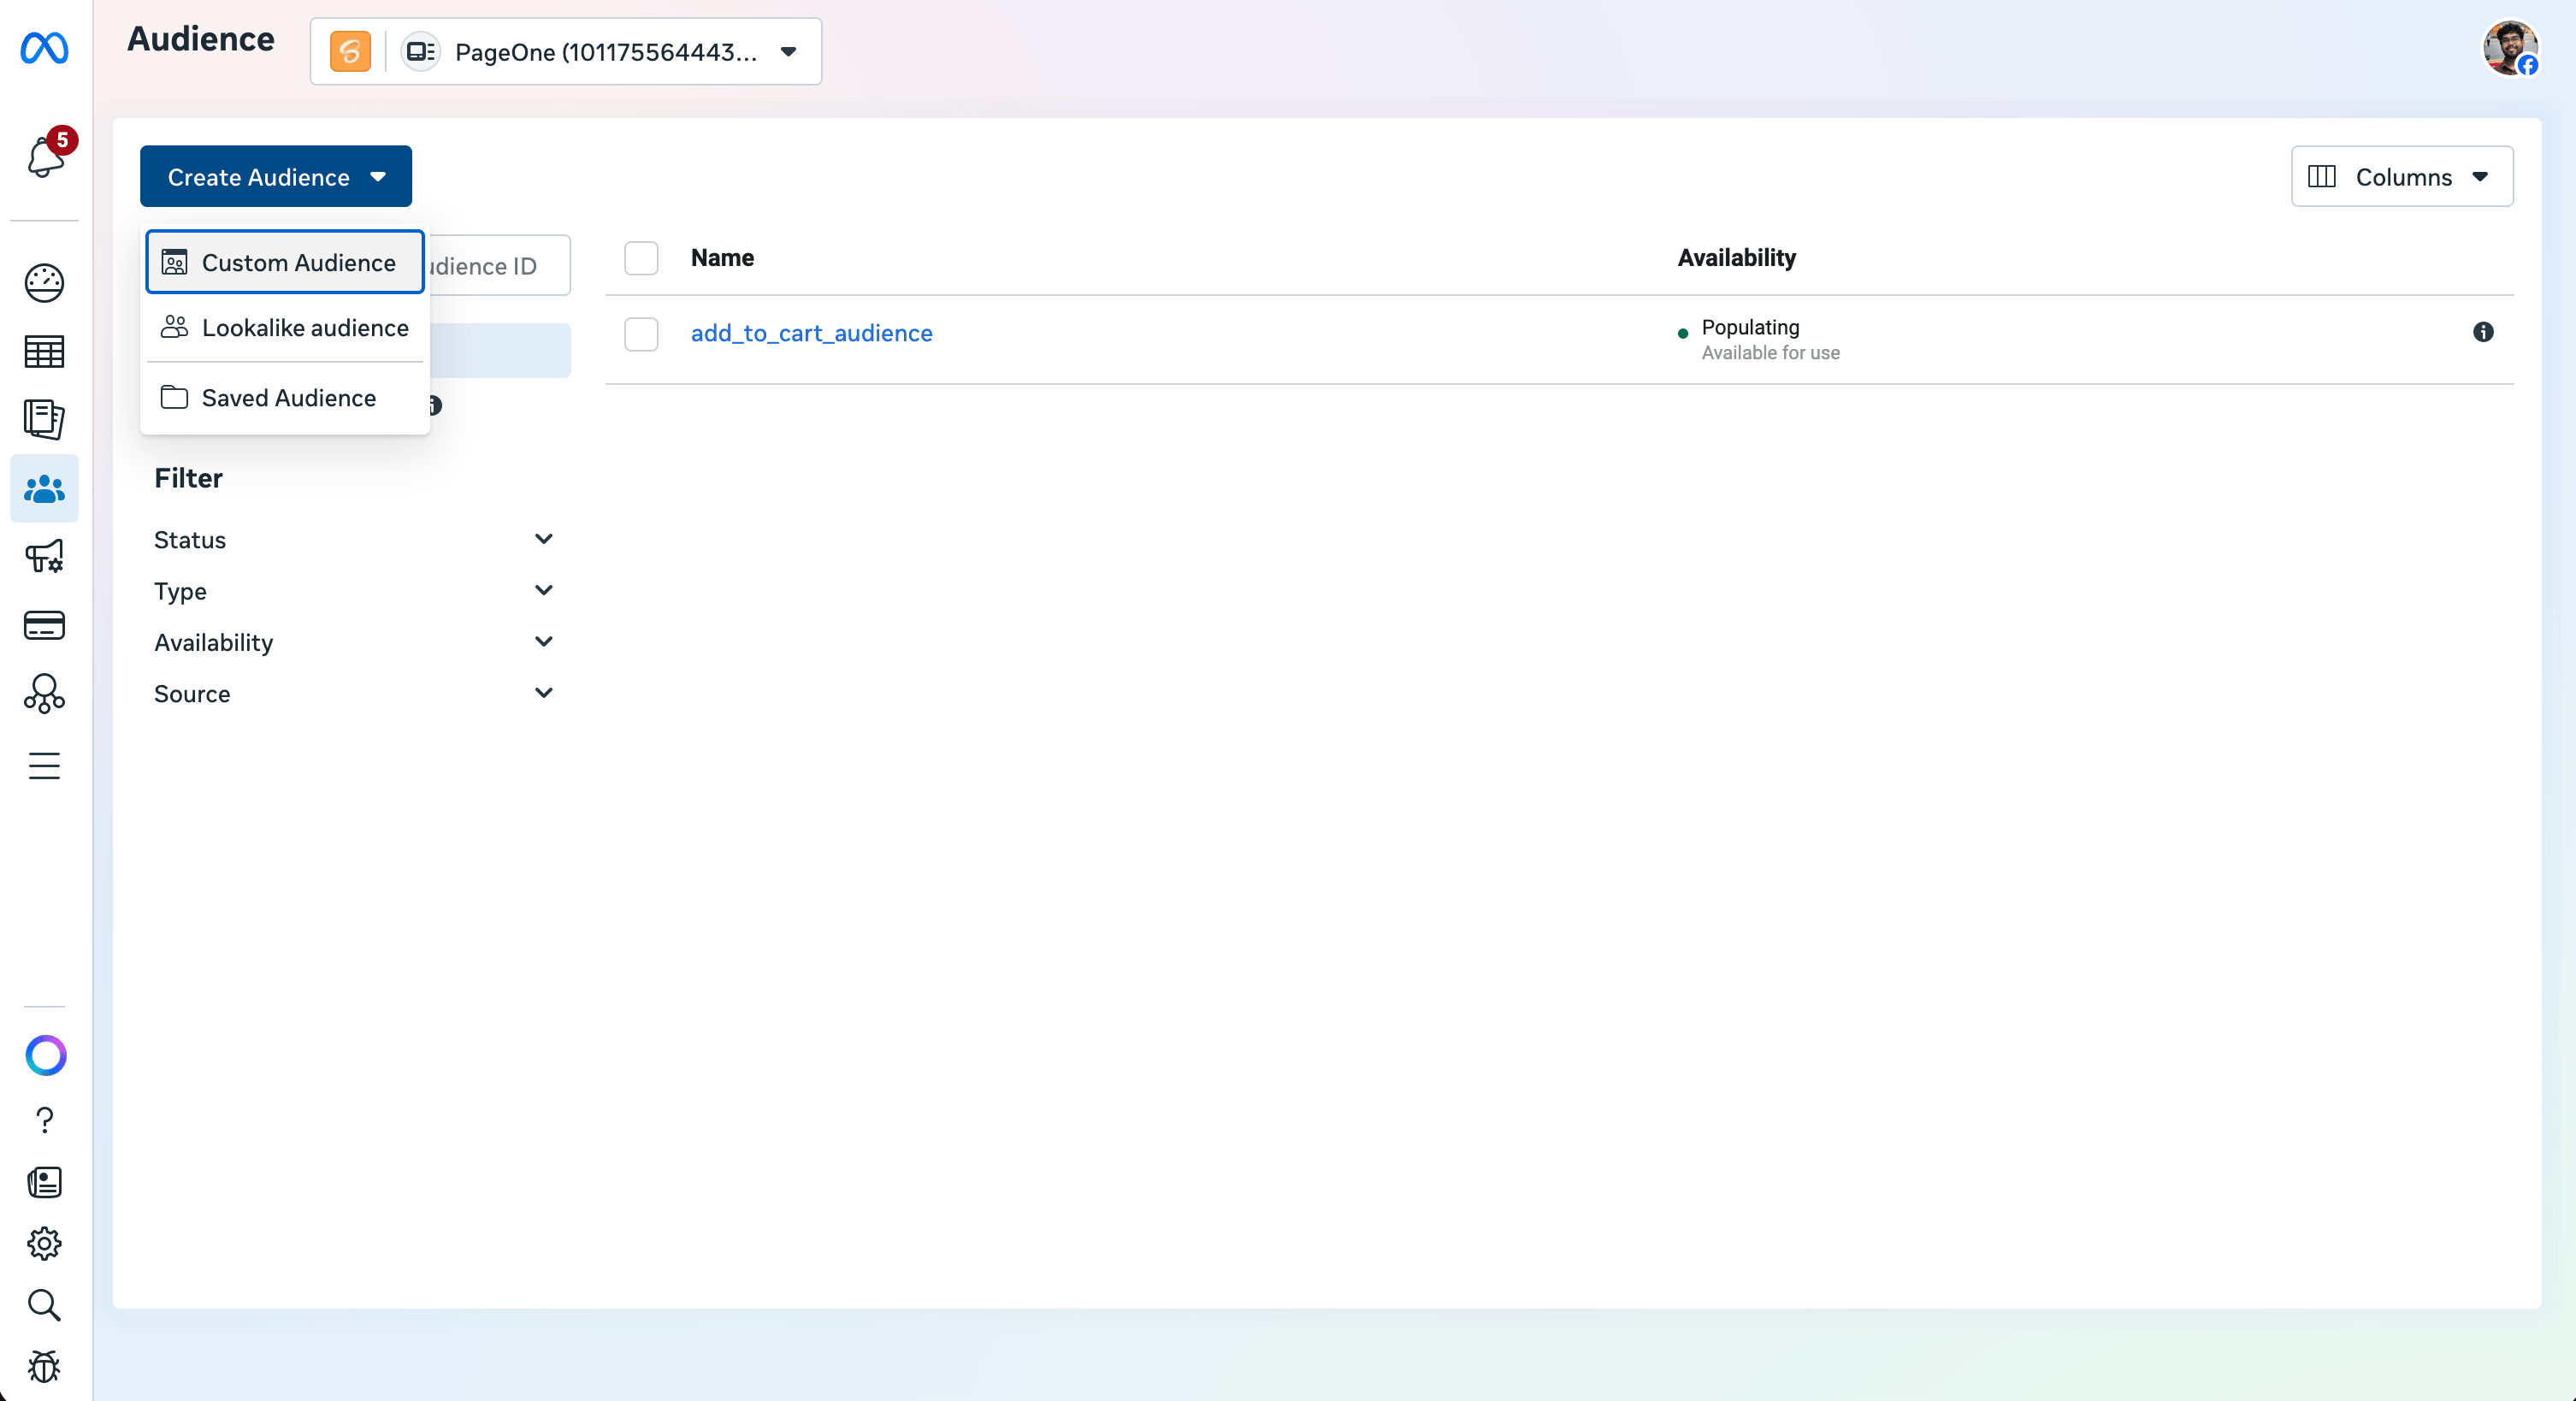
1. Click the blue **Create Audience** dropdown button
2. Select **Custom Audience**
#### Create a Custom Audience
1. Click the blue **Create Audience** dropdown button
2. Select **Custom Audience**
 #### Choose Your Source
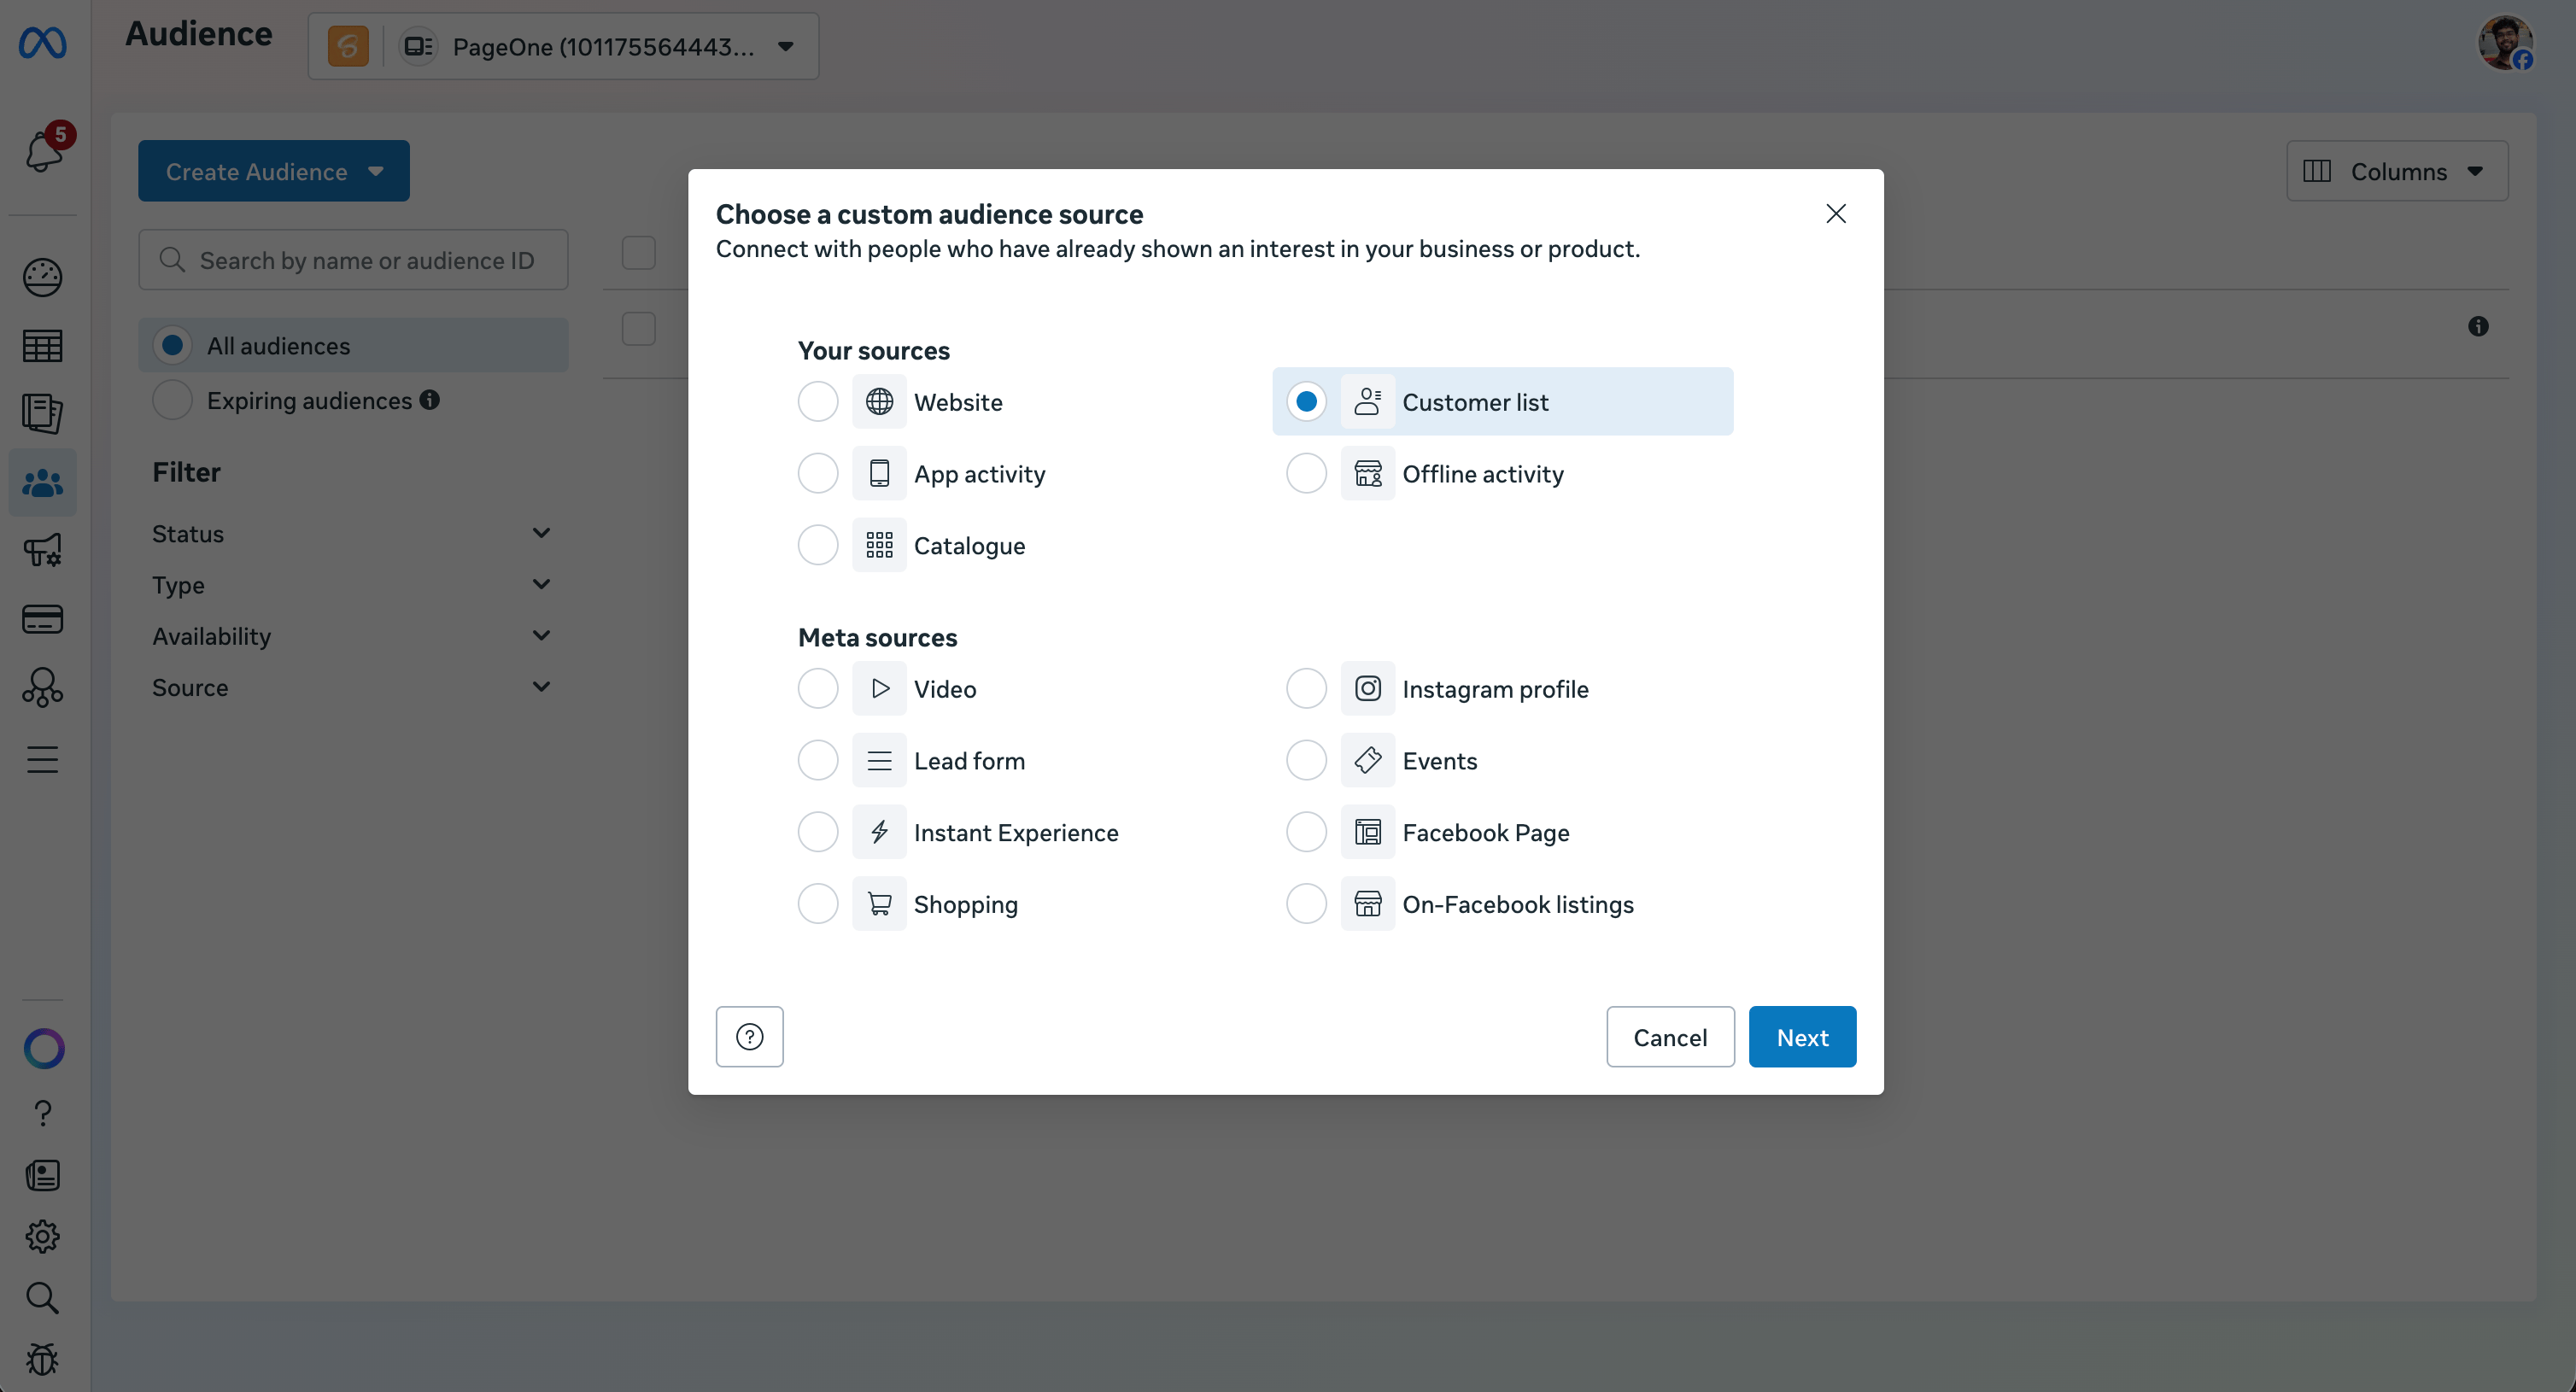
1. Under "Your sources," select **Customer list** and click **Next**
#### Choose Your Source
1. Under "Your sources," select **Customer list** and click **Next**
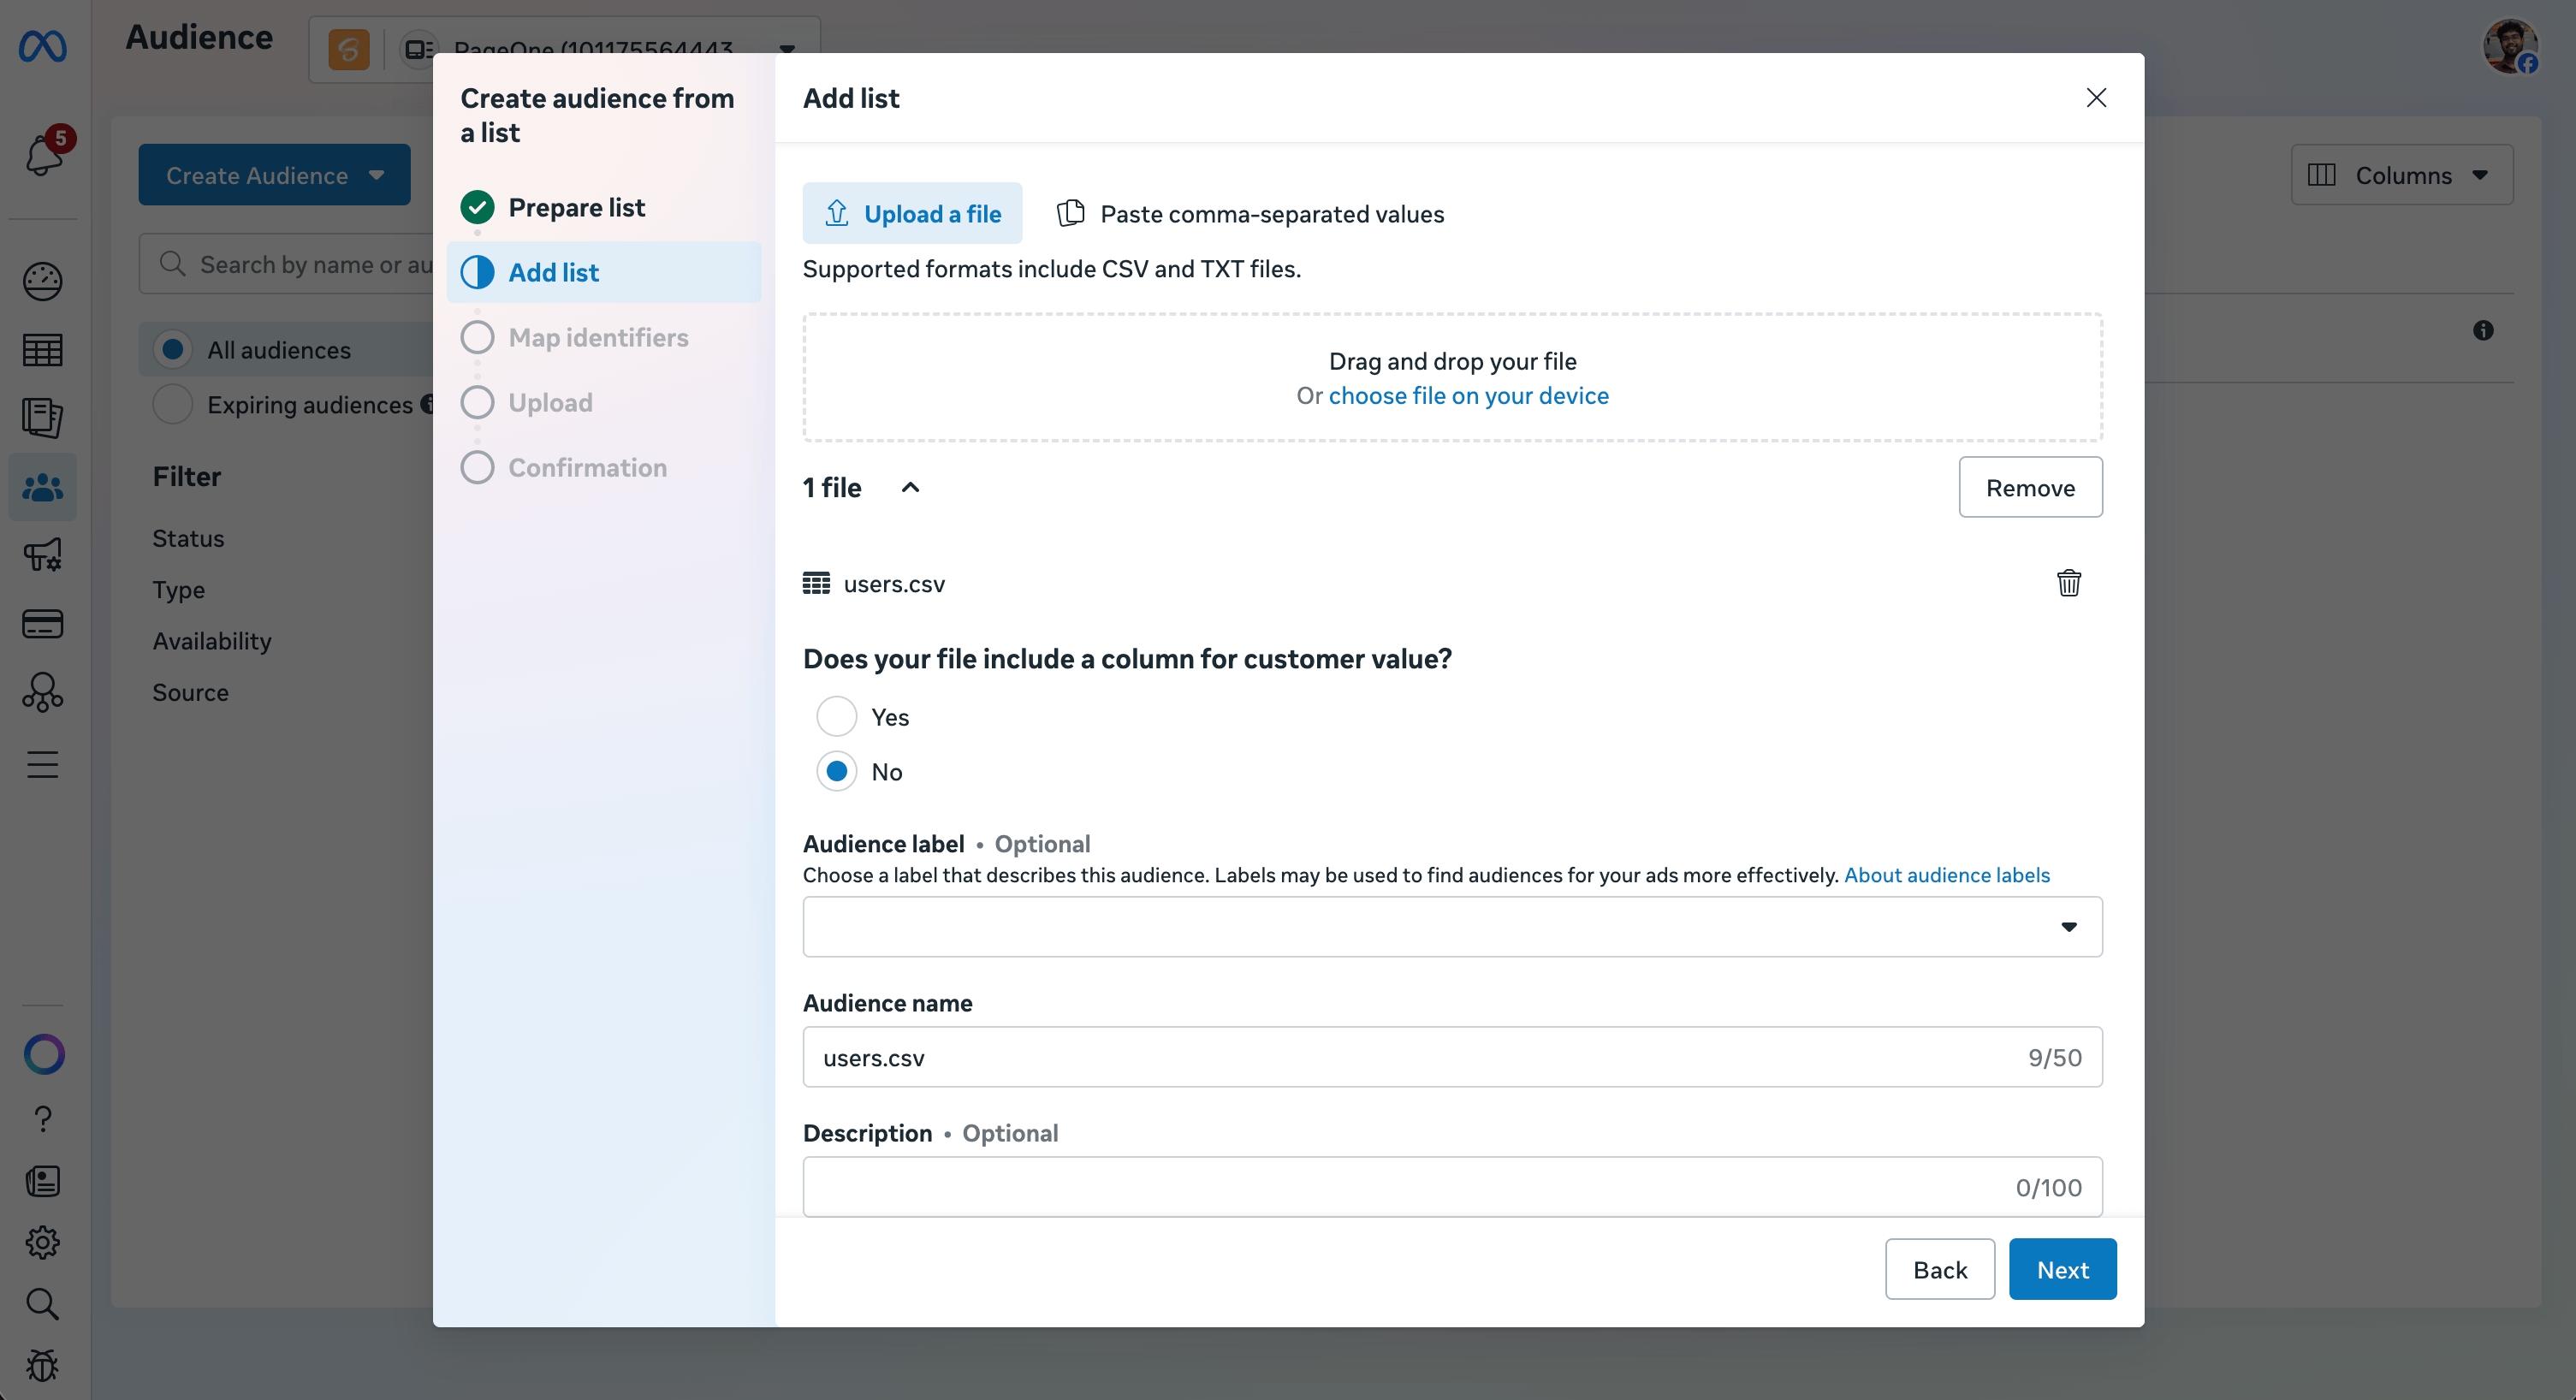
 2. **Upload File**: Drag and drop your CSV or TXT file, or click to upload it
 #### Set Up Your List
1. **Customer Value**: Meta will ask if your list includes a column for customer value. Select **No**, then click **Next**
2. **Name Your Audience**: Give it a clear, descriptive name (e.g., "Purchasers - March 2026") and an optional description. Click **Next**
#### Map Your Identifiers
1. Meta will preview your data and attempt to map your columns to its accepted identifiers
2. **Action Needed**: Review the "Mapped" and "Unmapped" tabs. If a column is unmapped, manually select the correct identifier from the dropdown menu, or tell Meta to ignore that column
#### Set Up Your List
1. **Customer Value**: Meta will ask if your list includes a column for customer value. Select **No**, then click **Next**
2. **Name Your Audience**: Give it a clear, descriptive name (e.g., "Purchasers - March 2026") and an optional description. Click **Next**
#### Map Your Identifiers
1. Meta will preview your data and attempt to map your columns to its accepted identifiers
2. **Action Needed**: Review the "Mapped" and "Unmapped" tabs. If a column is unmapped, manually select the correct identifier from the dropdown menu, or tell Meta to ignore that column
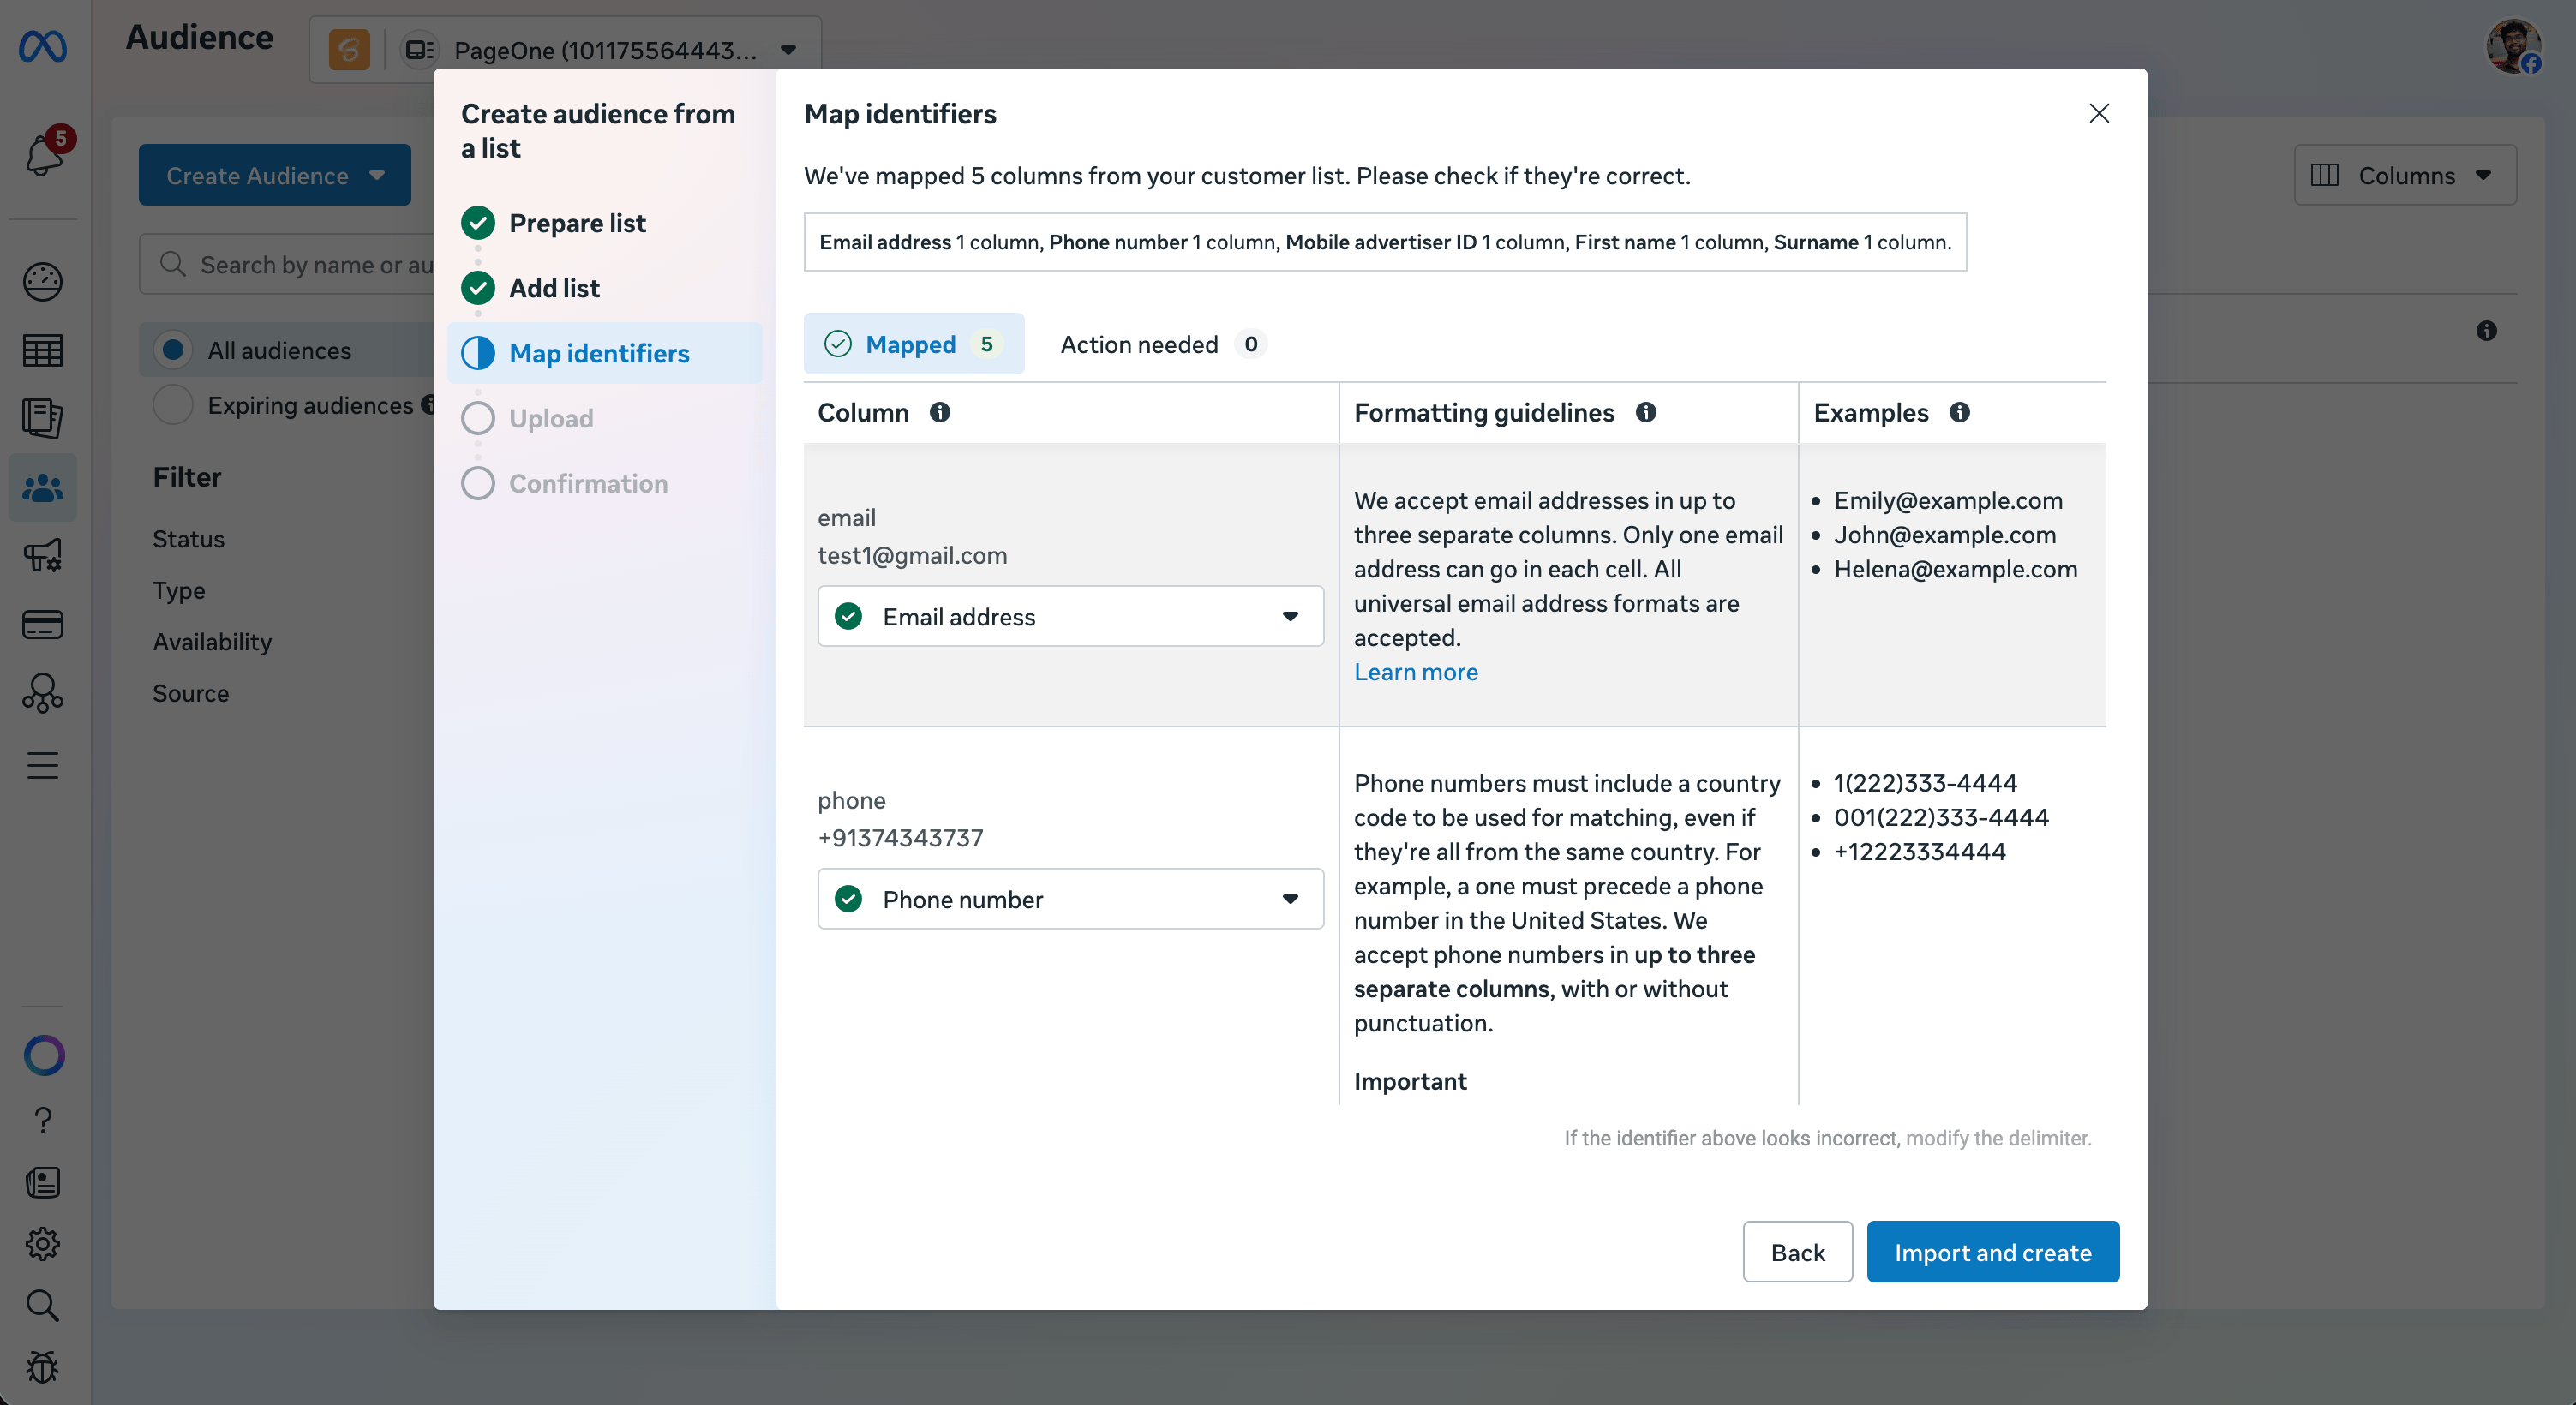 3. Click **Import and Create** to create the audience.